Flourless Chocolate Cake with Chocolate Glaze Recipe
Servings: 12 servings
Equipment
- 9-inch spring form pan
Ingredients
- 12 ounces bittersweet chocolate chips
- 1 cup butter = 2 sticks plus 3 tablespoons butter, cut into pieces
- 1¼ cups sugar
- 6 eggs
- 1 cup cocoa powder unsweetened
- 1 tablespoon milk
- 1 tablespoon honey
- ¼ teaspoon pure vanilla extract
Instructions
- Start by preheating the oven to 375ºF.
- This recipe requires a 9-inch spring form pan and I was happy to find out we owned one. You also need parchment paper to cut out a circular bottom liner. I used the spring form pan to trace out the right sized circle and then cut it out with kitchen scissors.
- Spray the spring form pan with cooking spray and then place the parchment paper into the pan and give that a spray too. Next, you need to get the chocolate ready.
- In a medium saucepan over medium-low heat, add 8 ounces of chocolate chips plus the 2 sticks of butter and cook until all the chips have melted and combined with the butter. This requires a lot of stirring. When nicely blended, remove from heat and scrape the contents into a large bowl.
- Add the sugar and mix well. Now it’s time for the eggs. You’ll add them one at a time, whisking energetically in between each egg.
- Sift the cocoa right into the bowl and stir with a large spoon until well blended. You sift the cocoa to remove any lumps it may have out of the package.
- In the spring form pan lined with the parchment paper, add the batter and bake for 35 to 40 minutes. You’ll know it’s ready when the cake rises and forms a thin crust on top. Another way to tell is checking the center of the cake. It should be just firm.
- When the cake is done, remove from oven and let cool for a good 10 minutes.
- To remove it from the spring form pan, loosen the spring to remove the side and then place a plate over the top of the cake so you can flip it over such that the cake is on top of the plate and ready for glazing. Remove the parchment paper from the top of the cake.
- Set the cake aside to cool and hope it doesn’t collapse like ours did. Our cake started out great but then collapsed a little on one side. Not to worry, we fixed it with extra glaze.
Chocolate Glaze - IMPORTANT - Prepare While the Cake Is Baking
- While the cake is baking, it’s time to make the glaze. Melt the remaining 4 ounces of chocolate with the remaining 3 tablespoons of butter in a saucepan over medium-low heat. Keep stirring with a wooden spoon until the chocolate and butter are melted, well blended and smooth. Remove the saucepan from the heat and add the milk, honey and vanilla. Let this cool.
Assemble the Cake
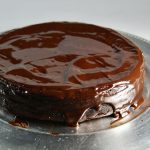
- When the cake is cool enough to work with, pour the chocolate glaze onto the center of the cake and spread with a spoon or pastry spatula. Ideally, you’ll end up with a super smooth glaze on top of the cake as well as the sides. Because I had to fill in our small crater on top with glaze, I didn’t have enough to go around the sides but it still looked and tasted great.
- Put the cake into the refrigerator uncovered and let it chill out for at least 45 minutes before serving. This should make it easier to cut.
Notes
This is a very cool looking cake and couldn’t be easier to make. It also tastes great but how could it not with all that chocolate, eggs and sugar.
Consider serving with vanilla ice cream, whipped cream, or a raspberry glaze. It was a huge hit at the dinner party.