Learn How to Saute, Common Sauté Mistakes & How to Avoid Them
Sautéing is the secret handshake of the kitchen—once you master it, you instantly level up your cooking game. It’s the art of tossing ingredients in a hot pan with a little oil or butter, turning humble veggies, meats, or even tofu into golden, flavorful masterpieces.
Sounds simple, right? Well, it is… until your garlic burns faster than your patience, or your onions stick like they’ve got something to prove. But don’t worry, I’ve got your back.
In this post, I’m diving spatula-first into the sizzling world of sauté. You’ll learn how to get that perfect sear, avoid the dreaded soggy mess, and make your pan your new best friend.
Plus, I’ll share a few tips that’ll have you sautéing like a pro—no smoke alarms required. Whether you’re a kitchen newbie or just want to polish your skills, sautéing is a must-have move that adds flavor, texture, and a bit of swagger to any dish.
So grab your skillet, and let’s get cooking—your taste buds are in for a treat!
Start With the Right Pan
Choosing the wrong pan when sautéing often causes mistakes that ruin your dish’s quality. Using the right pan plays a crucial role in distributing heat evenly, preventing overcrowding, and helping ingredients cook uniformly while developing the perfect texture.
Here’s why the right pan matters:
Even Heat Distribution:
A good sauté pan usually has a wide, flat surface and straight sides to spread heat evenly. If you use a small or cheap pan, heat concentrates in certain spots, burning some ingredients while leaving others undercooked.
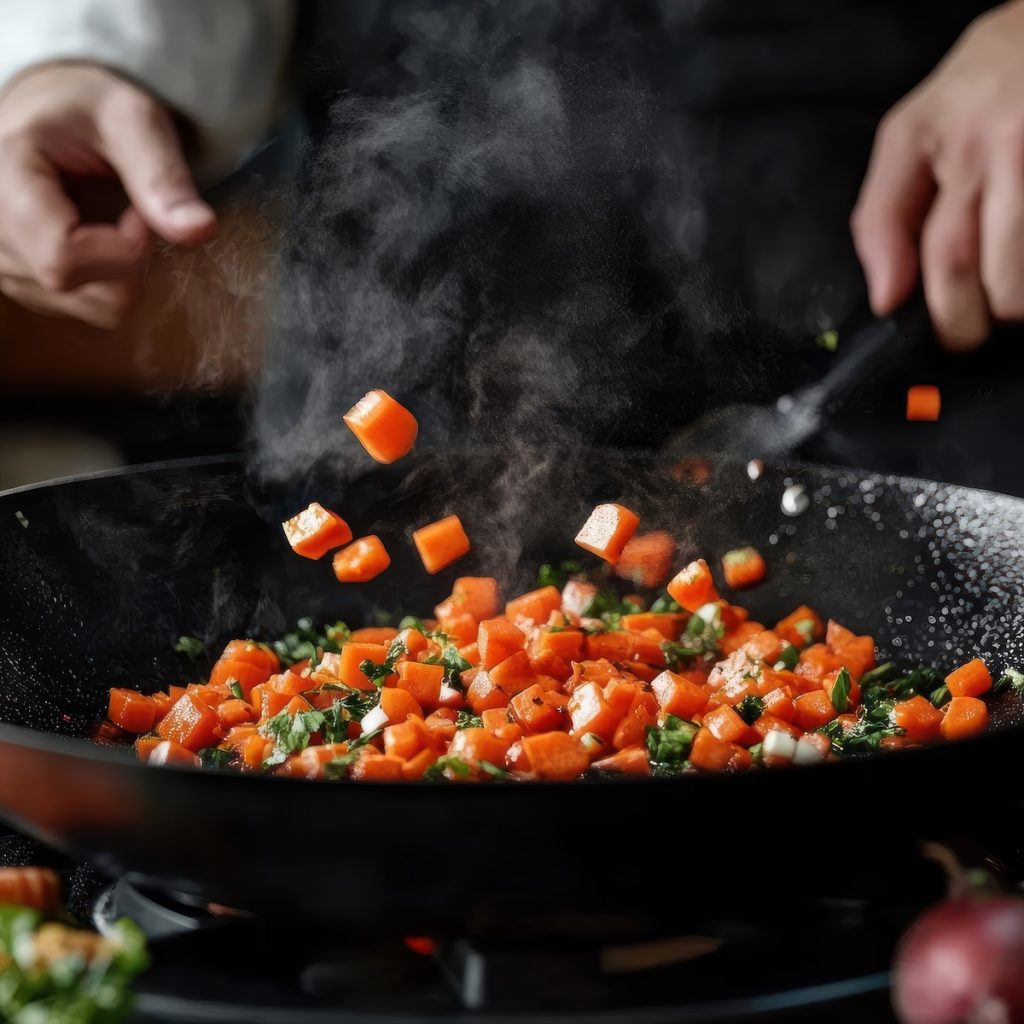
Avoid Overcrowding:
When you crowd the pan, ingredients release moisture and steam instead of sautéing properly. A wide pan gives each piece enough space to touch the hot surface, allowing it to brown and caramelize instead of turning soggy.
Heat Retention:
The right sauté pan holds heat well. Thin pans lose heat quickly, cooling the surface and preventing a good sear. Thicker pans—like those made from stainless steel or cast iron—keep the temperature steady for better browning.
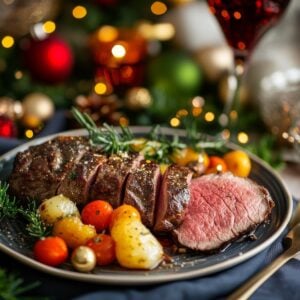
By picking the right pan, you ensure your ingredients brown beautifully, cook evenly, and develop the rich flavors and textures that make sautéing so satisfying.
The Fix — Grab the Right Pan
Picking the right pan makes sautéing way easier and more fun. Usually, you want a sauté pan or skillet with a few key features that help your food cook just right. Here’s what to look for:
Material:
Stainless steel holds heat evenly and browns food beautifully.
Cast iron keeps heat locked in and can get naturally non-stick over time—perfect for high-heat cooking.
Non-stick pans are great if you want to cook with less fat, but just make sure they can handle high heat if you’re searing.
Shape:
Go for a pan that’s wide and shallow with sloped sides. That shape gives you plenty of room so your ingredients don’t crowd each other, which helps everything brown nicely.
Size:
Match the pan size to how much you’re cooking. Most home cooks do great with a 10- to 12-inch pan. Bigger pans work well for big batches, and smaller ones are perfect for quick meals or small portions.
Handle:
Look for a sturdy, heat-resistant handle that feels good in your hand and lets you move the pan around easily.
Lid (optional):
Not a must-have, but a lid can come in handy for steaming veggies or reducing sauces.
Recommended picks:
Sauté pan: Straight sides, big surface, often with a lid.
Frying pan/skillet: Flared sides that make flipping and stirring a breeze.
Using the right pan sets you up for better flavor, texture, and all-around delicious results every time you sauté.
Preheat the Pan
When I first started cooking, I stuck food to my pans more times than I care to admit—sometimes burned right onto the surface. I couldn’t figure out why it kept happening. How could a smooth, shiny pan hold onto food like that?
Then I realized I’d broken one of the golden rules of cooking: Never cook in a cold pan.
If you zoomed in on a metal pan, you’d see tiny scratches and nicks all over the surface. Those little imperfections give food plenty of places to cling to. Since many sautéed foods—like meat and fish—are packed with proteins (and proteins are basically natural glue), putting cold food into a cold pan lets those proteins sink into the scratches and stick tight.
The Fix — Preheat Your Pan!
Heat expands the metal, smoothing out those microscopic nooks and crannies. When you add food to a hot pan, the proteins immediately start cooking and form a crust that easily releases once set.
Once I started preheating my pans, the sticking struggles vanished. It was a game-changer!
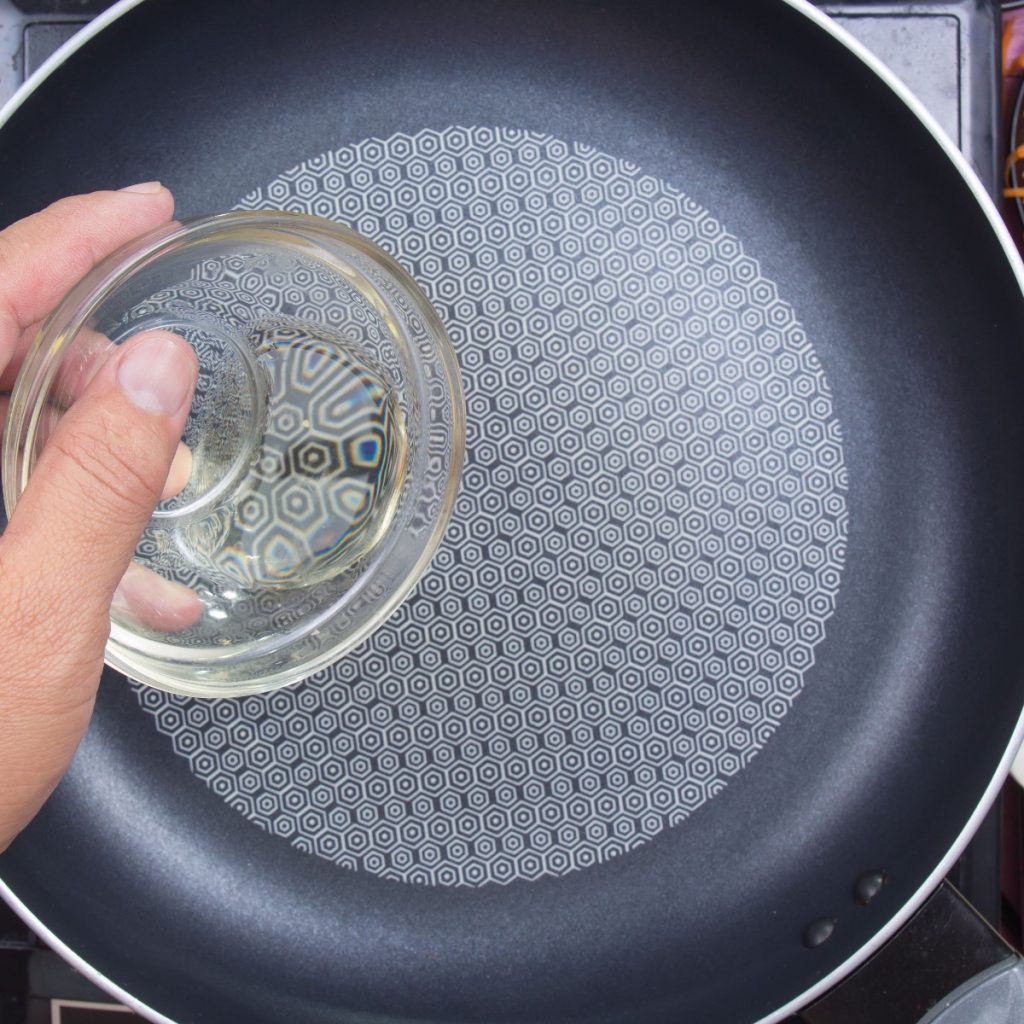
Want to know when your pan’s ready? Drop a few water droplets in. If they dance and evaporate instantly, your pan is at least 212°F—perfect for cooking. Proteins brown around 330°F, so if the water disappears right away, you’re good to go. If not, give your pan another minute or two, then test again. For me, about four minutes of preheating hits the sweet spot every time.
With this simple trick, you’ll turn sticky frustrations into golden, perfectly sautéed successes!

Add Oil to a Preheated Pan
It’s super frustrating to preheat your pan only to watch your oil start smoking and burning before the pan is truly hot. We all want that perfect sizzle—but how do you get your oil hot enough without burning it?
The Fix — Add Oil to a Preheated Pan
Sautéing means keeping control and working with the highest heat you can handle. We already know to add food to a hot pan—but here’s the secret: wait until the pan is hot before pouring in your oil. This simple step helps keep your oil from burning.
Why? First, safety. If you add oil to a cold pan and then heat it, water droplets or moisture can cause the oil to spatter, risking painful burns. To stay safe, always test your pan’s heat before adding oil.
Second, adding oil to a hot pan means the oil heats up faster. Less heating time equals less chance for burning, which means your oil stays smooth and ready for action.
So here’s the rule: heat your pan until it’s hot, test the temperature, then add your oil. The oil is ready when it shimmers—a beautiful, glossy ripple across the surface. That shimmer signals it’s time to add your food and get cooking. The shimmer always comes before the oil smokes, so you’re in perfect control.
Follow this simple step, and you’ll have gorgeous sauté results without the frustration!

Use the Right Fats to Saute With
To get that perfect quick and even browning, you want to sauté in a hot pan—at least 330°F. That’s great in theory, but many common fats start smoking and breaking down before reaching that temperature.
Here’s a quick look at some kitchen favorites and their smoke points:
Extra virgin olive oil = 320°F
Butter = 350°F
Vegetable shortening = 360°F
Refined canola oil = 400°F
Peanut oil = 440°F
The Fix, Part 1 — Choose Fats with High Smoke Points
Looking at the list, it’s clear that extra virgin olive oil doesn’t make the best sauté partner since its smoke point is below where proteins start to brown. Pick oils with smoke points of at least 400°F to avoid burning and off-flavors. When oil smokes, it breaks down, potentially creating unpleasant or even harmful compounds. Canola and peanut oils are reliable, safe choices for high-heat cooking.
Butter adds incredible flavor, but milk solids burn well before the fat reaches its smoke point. So, skip pure butter for sautéing unless you’re using clarified butter.
The Fix, Part 2 — Blend Your Fats
Want that buttery richness without the burn? Mix half butter with half oil. Once your pan is hot, add a little oil and a splash of butter. Swirl them together until the butter melts and the oil heats up, then toss in your food. This combo gives you the best of both worlds—flavor and performance, making your sauté delicious!
Go Easy On the Cooking Fat
You might feel like a pro chef when you generously pour fat into your pan for sautéing. But here’s the catch—using too much oil changes the whole game. Instead of sautéing, you end up pan-frying.
When you add more fat than needed to just coat the bottom, the oil pools up, creating depth. Your food then sits in hot fat instead of on a thin, even layer. That’s pan-frying, not sautéing.
The Fix — Use Just Enough Fat
A big reason home cooks add too much fat is that they start by pouring it into a cold pan. Cold fat is thicker and won’t spread out thinly like hot fat does.
Remember the winning sequence: heat your pan first, then add the oil. Let the oil warm up, and then add your food. You’ll probably only need about a tablespoon of fat.
Give your hot pan a quick swirl—your oil should spread out smoothly, coating the surface. The fat acts as a heat conductor here, helping cook your food evenly. In sautéing, fat works more as a cooking medium than just an ingredient.
Are you wondering when you get to toss or jump your food in the pan? You usually don’t for presentation-worthy cuts of meat. But when sautéing veggies, go ahead and have some fun tossing them!
(Pro tip: Practice tossing dried beans in a cold pan before you try flipping 350°F onions over a blazing stove. Your fingers will thank you!)
Prep the Ingredients Before You Start Cooking
One of the biggest mistakes you can make when sautéing is waiting to chop your ingredients until after you start heating the pan.
Sure, you have plenty of time to dice onion, carrot, and celery while the pan warms up—but that’s a fast track to overheating your pan. When your pan gets too hot before adding fat, the oil smokes and breaks down immediately, forcing you to start over.
The Fix — Mise en Place: Prep Ahead
Professional chefs swear by mise en place, and it’s just as powerful in your home kitchen. “Mise en place” means “put in place,” it’s all about prepping, measuring, and getting every ingredient and tool ready before you even turn on the stove.
When sautéing, mise en place is a total game-changer. You must keep your eyes and ears on the food constantly, so you won’t have time to chop garlic or peel carrots mid-cook. Follow this simple sequence:
Prep all your ingredients—chop, mince, measure, and portion everything beforehand.
Heat your pan.
Add the fat and let it heat.
Cook your food.
Stick to this flow, and you’ll avoid burned food, forgotten ingredients, and kitchen stress. Prep smart, sauté happy!
Sauteing with Your Ears
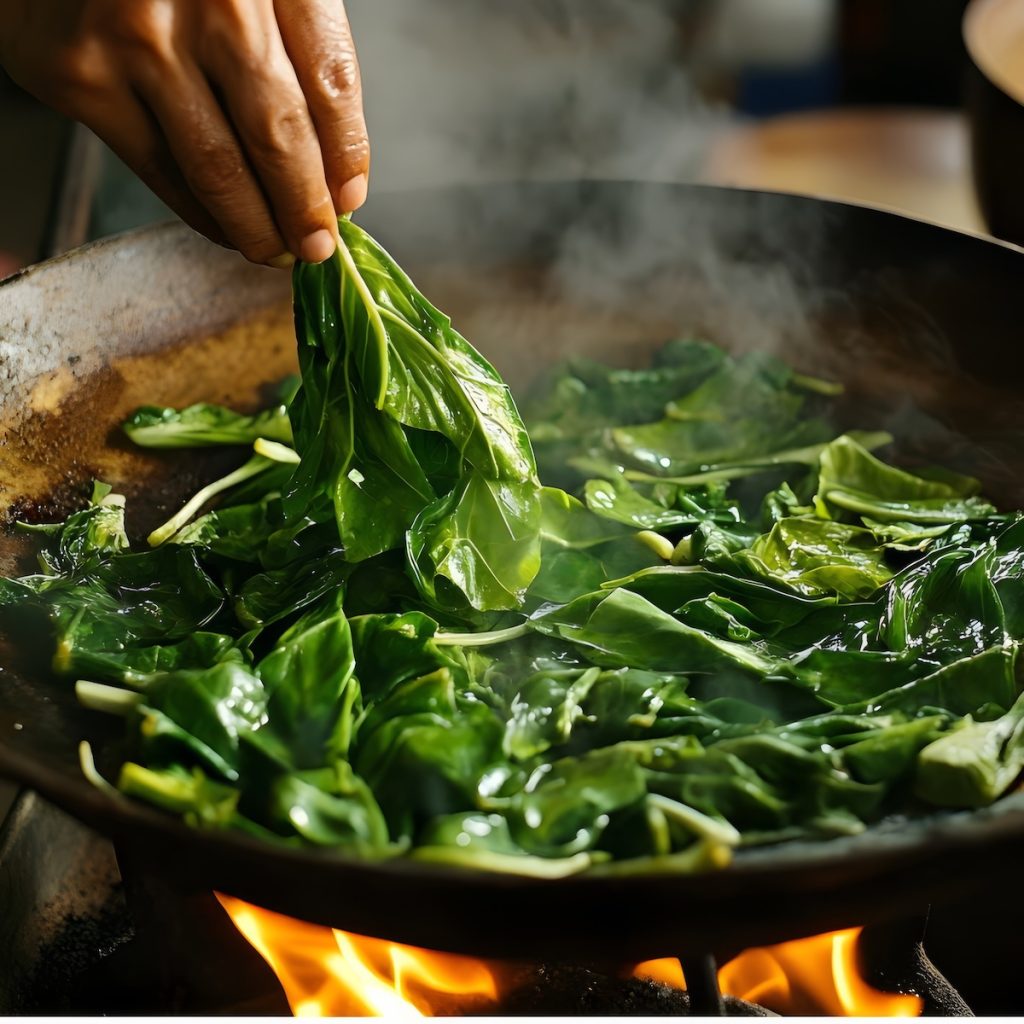
Once you heat your fat over medium-high to high heat, add your food. At first, you’ll hear a happy sizzle—but if that sizzle quickly turns into angry sputtering, the fat starts smoking, and your food begins to burn.
The Fix — Use Your Ears
Sautéing demands your full attention. Unlike a slow braise you can leave unattended for hours, sautéing keeps you right at the stove, ready to react.
While it’s crucial to heat your pan before adding fat and ingredients, you also need to stay flexible and adjust the heat up or down as you go. Think of sautéing like driving a car: sometimes you press the gas, sometimes you hit the brakes, and sometimes you coast to keep a steady speed.
At times, you might even need to remove the pan from the heat briefly, letting the residual warmth finish cooking your food gently.
So, how do you know when to adjust the heat? Listen closely.
A steady, clear sizzle means you’re on track. If the sizzle grows loud, turning into sputtering and crackling, that’s your cue to lower the heat or briefly take the pan off the burner.
If the sizzle fades or disappears, turn up the heat.
With practice, you’ll naturally keep that perfect sauté rhythm—your ears guiding you to delicious results every time.
Use the Correct Size Ingredients
Not every cooking method fits every ingredient. Try sautéing a whole roast to doneness, and you’ll quickly see why—its exterior burns long before the center cooks through.
That’s because sautéing uses high heat. You can’t lower the temperature enough to avoid burning and still call it a sauté. Bigger cuts simply take too long to cook for this fast, high-heat technique.
The Fix — Sauté Smaller Cuts
When you sauté whole cuts like chicken breasts or lamb chops, make sure they’re no thicker than ½ inch. That applies to beef, too. If needed, use a smooth meat mallet to pound them to the right thickness so they cook through before the outside overcooks.
For dishes like stir-fries, cut meat into ¾-inch chunks. This helps them cook evenly and quickly while still browning nicely.
Vegetables need the same treatment. If you’re sautéing a mix like carrots, onions, and celery, dice everything into small pieces—no larger than ¼-inch cubes.
When sautéing is your only cooking method, small, uniform cuts are essential. They shorten the distance heat must travel from the pan to the center, allowing you to cook everything evenly without charring the outside. Keep it small, keep it sizzling, and you’ll get golden, perfectly cooked results.
Saute with the Right Cuts
Sautéing uses high, dry heat, so it makes sense that your food will lose some moisture in the process.
That’s not a problem when you’re cooking thin, lean cuts of meat—they’re perfect for this quick, hot method. But if you try to sauté tougher cuts with lots of connective tissue (the kind that love a long bath in a braise), you’ll end up with dry, chewy results.
The Fix — Know Your Cuts
Stick with meats that shine in a sauté. Chicken breasts (especially small or pounded ones), fish fillets, thin-cut pork or beef tenderloin, and pork or lamb chops all do well. These leaner cuts cook quickly and develop great flavor from browning in the hot pan.
Here’s a simple trick to boost presentation: always place the “presentation side” of the meat in the pan first. This side gets the best sear because the pan is hottest at the start. It doesn’t affect flavor—it just makes your dish look better on the plate.
With chicken and fish, place the side that was closest to the skin face-down first. The cut side—where it was removed from the bone—usually looks a little rougher, so save that for the bottom.
Don’t Overcrowd the Pan
As busy home cooks, we often try to speed up dinner prep—and sautéing seems like the perfect shortcut. But when you crowd too much food into the pan, you actually slow things down and miss out on that delicious golden sear.
The Fix — Give the Food Some Space
Spread your food out in a single layer so each piece has room to breathe. This is especially important when sautéing small items like diced vegetables. When ingredients overlap, they trap steam, and the pan stays at 212°F—the boiling point of water—instead of climbing high enough for browning.
Sautéing thrives on dry, high heat. To get a good sear, the moisture needs to evaporate quickly. That won’t happen if your pan is too full.
If you’re cooking something like chicken breasts in a smaller pan, work in batches. It may feel like it takes longer, but each batch will cook faster and taste better.
You’ve probably seen this with stew meat: add too much at once, and it releases liquid, steams instead of browns, and robs you of those deep, rich flavors that only develop around 330°F. So take your time—good sautéing rewards patience with amazing taste.
Pay Attention
When you place a piece of meat in a hot pan, you can’t see what’s happening on the side touching the surface. All you see is raw meat—and that can tempt you to poke, lift, or flip it prematurely.
You might try lifting the edges to check for browning or even flip the meat altogether. But when you move it too soon, you risk tearing the surface or leaving it with a weak, uneven sear.
The Fix — Let the Meat Talk to You
Even though you can’t see the bottom, the top gives away plenty of clues. When you first add meat to a hot pan, you’ll hear that satisfying sizzle. That’s your cue that the pan’s doing its job.
After about a minute, watch the edges of the meat closely. They’ll start to shift from translucent to opaque—your first sign that the proteins are cooking. Now, resist the urge to move it. Just let it be.
As the heat drives out moisture, you’ll see tiny beads of liquid forming on the top. Then, a ring of opaque meat will slowly creep up from the edges toward the center. When it looks like the meat is about two-thirds cooked through, go ahead and flip it.
If you’ve waited long enough, the meat will release easily. That’s one of the best signs you’ve achieved a proper sear. On the second side, cook it for another minute or two—just long enough to finish the job.
To check for doneness, use an instant-read thermometer. For thin cuts like chicken breasts or pork chops, remove the meat when it’s 2 to 4 degrees below your target temperature. The carryover heat will bring it the rest of the way as it rests.
This hands-off, observant approach takes the guesswork out of sautéing and gives you beautifully browned, juicy results—every time.
Don’t Forget a Pan Sauce
Since sautéing uses dry heat and works best with lean cuts, your meat will develop great flavor from browning—but it might turn out a little dry due to moisture loss. That’s perfectly normal. Now, take a look at your pan.
See those golden to dark brown bits clinging to the bottom? That’s fond, and it’s packed with concentrated flavor. Don’t let it go to waste—turn it into a quick, delicious pan sauce.
The Fix — Make a Quick Pan Sauce
You’ve already saved time by sautéing, so don’t worry—this sauce won’t take long. You can make it while the meat rests, elevating your dish in minutes.
Let’s say you’ve cooked three chicken breasts for four people. You only need a tablespoon or two of sauce per serving—just about ¼ cup total. That’s quick work over high heat.
Place your sauté pan back over high heat and give it a minute to warm up. Watch closely—you want the fond to stay dark and flavorful, not burn.
Pour in ¼ cup each of orange juice and low-sodium chicken broth. Use a wooden spoon or spatula to scrape up the fond as the liquid simmers. Let the sauce reduce by half until it turns thick and syrupy.
Taste and adjust the seasoning with salt, pepper, or a sprinkle of fresh herbs.
Off the heat, swirl in a teaspoon of butter or a splash of heavy cream to add richness and a velvety finish. Or skip it—your sauce will still shine.
Drizzle a spoonful over each piece of meat and watch how it transforms the dish.
This is just one idea, but the method stays the same. A quick reduction, a splash of flavor, and you’ve turned simple sautéed meat into a complete, elegant meal.
3 Responses
Really enjoy your article. Nice clear instructions. Thanks.
Love this idea. It’s impossible to correct a disaster without knowing where it went wrong. Your site is well worth following
Thank you! This article really helped me and was easy to follow.