

How to Braise Food Properly: Tender Meat, Rich Sauce, No Guesswork
Braising is the secret to tender meat and flavorful vegetables—without standing over the stove all day. If you’ve ever wrestled with tough cuts or bland veggies, braising solves the problem. It’s part searing, part slow cooking, and all about building deep, rich flavor.
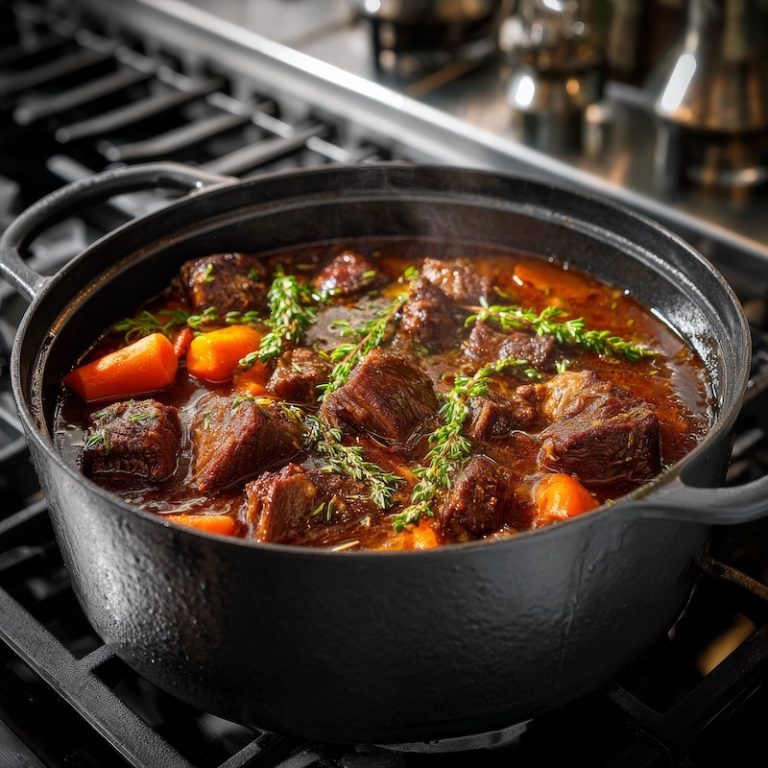
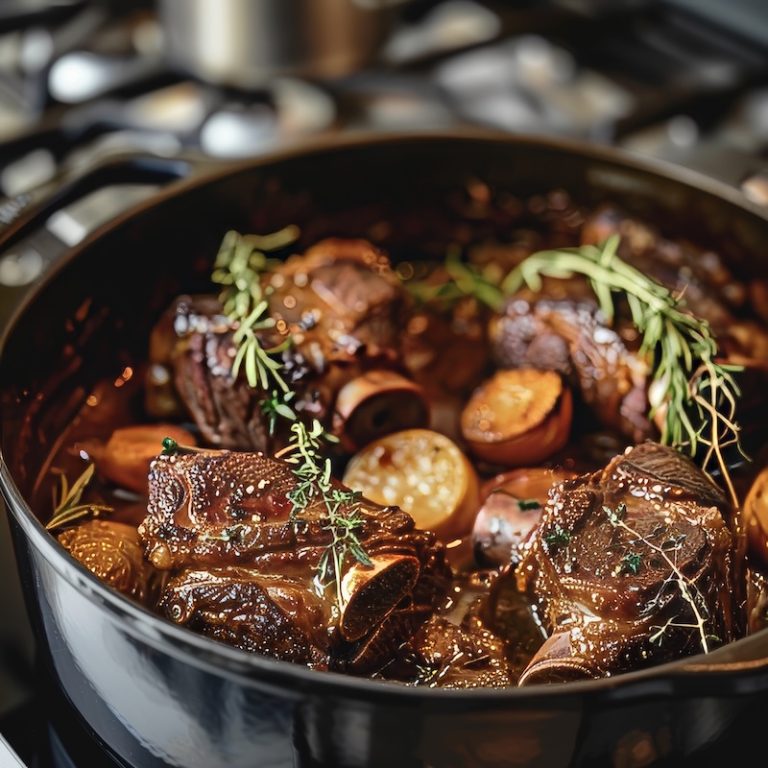
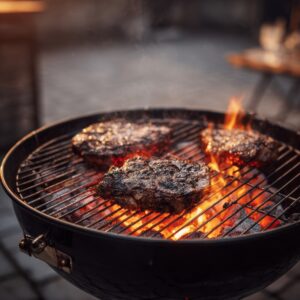
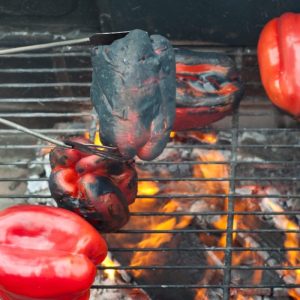
Start by giving your meat or vegetables a golden crust in a hot pan. This locks in flavor and creates a savory base for your sauce. Then add just enough liquid—broth, wine, or a sauce—to partially cover the food. Cover the pot, lower the heat, and let time work its magic.
Tough cuts transform into fork-tender meals. Vegetables become silky, infused with herbs and spices. The low, gentle heat breaks down connective tissue and concentrates flavors, so every bite is a winner.
You don’t need fancy tools. A heavy pot with a lid works perfectly—Dutch ovens are ideal. This method crosses cuisines effortlessly: French coq au vin, Italian osso buco, Korean galbi jjim, or a classic pot roast. Once you grasp the basics, you can braise almost anything.
The best part? Most of the work happens without you hovering over the stove. Braising is simple, satisfying, and a must-have skill in every home cook’s kitchen. Master it, and you’ll turn everyday ingredients into meals that feel extraordinary.
Quick Wins Before You Braise
- Use a heavy pot or Dutch oven.
- Cut meat uniformly for even cooking.
- Sear first—flavor lives in the crust.
- Add just enough liquid to partially cover.
- Low, slow heat = tender results.
Common Braising Mistakes
- Don’t skip searing—it’s flavor gold.
- Too much liquid dilutes sauce.
- High heat = dry meat.
- Not covering pot = evaporated flavor.
Braising At a Glance
| Ingredient Type | Best Cuts/Items | Liquid | Oven Temp | Braise Time | Quick Tip |
|---|---|---|---|---|---|
| Beef | Chuck, Short Ribs | Broth, Wine | 325°F | 2–3 hrs | Sear first for flavor |
| Chicken | Thighs, Drumsticks | Stock, Wine | 300°F | 1–1.5 hrs | Brown skin for color |
| Vegetables | Carrots, Onions, Mushrooms | Broth, Tomato Sauce | 325°F | 30–45 min | Don’t overfill liquid |
Nine Simple Steps to a Great Braise
1. Season the main ingredient with salt and pepper.
2. Heat a few tablespoons of oil and/or butter in a heavy pan or Dutch oven.
3. Saute meat or vegetables in the pan on medium-high heat until the meat browns.
4. Deglaze the pan by pouring broth, beef stock, wine, or juice, scrape any pieces of meat stuck to the pan, and stir.
5. Add cooking liquid (water, stock, wine, juice, or some combination) to the halfway point of the main ingredient.
6. Cover and place the meat on the middle of a rack in an oven preheated oven to 300° – 350° Fahrenheit.
7. Cook until completely tender. This can range from 1 to 6 hours, depending on your cooking.
8. Remove the pan from the oven and strain the meat and vegetables from the liquid.
9. Remove the excess fat floating in the liquid, and then reduce the sauce to the desired thickness by cooking it down over low heat until it thickens. Alternatively, you can make gravy by combining equal parts fat and flour (a roux).
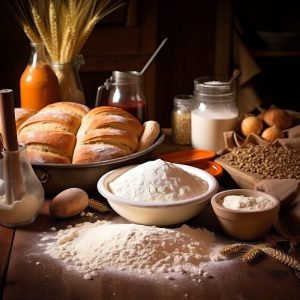
What Ingredients Are Best For Braising?
| Category | Ingredient | Description | Why It’s Good for Braising |
|---|---|---|---|
| Beef | Beef Chuck Roast | A well-marbled cut from the shoulder. | The fat and connective tissue break down into rich, tender meat. |
| Beef Short Ribs | Meaty ribs with layers of fat and cartilage. | Long cooking melts collagen, creating deep flavor and silky texture. | |
| Beef Brisket | Flat, tough cut from the breast section. | Slow heat turns it succulent and flavorful. | |
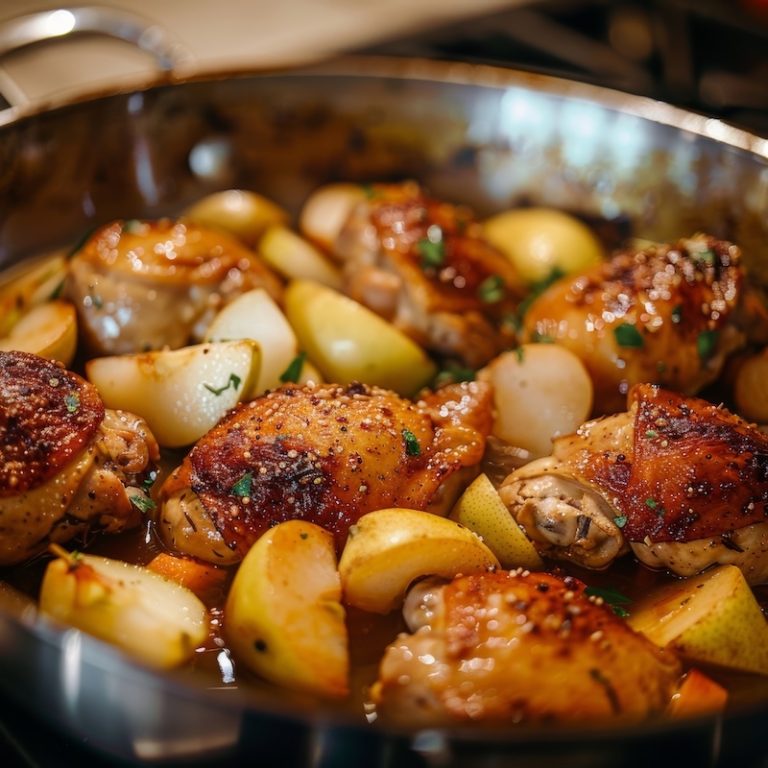
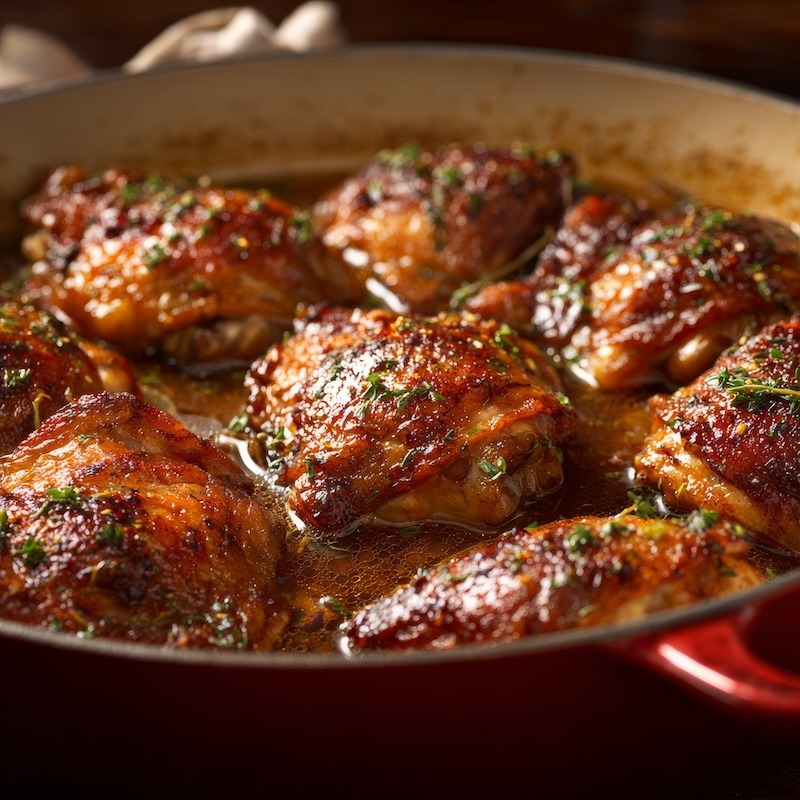
| Poultry | Chicken Thighs | Dark meat with skin-on or skinless options. | Moist and flavorful, stays juicy during long cooking. |
| Chicken Legs | Drumsticks or whole legs with rich dark meat. | Can handle extended cooking without drying out. | |
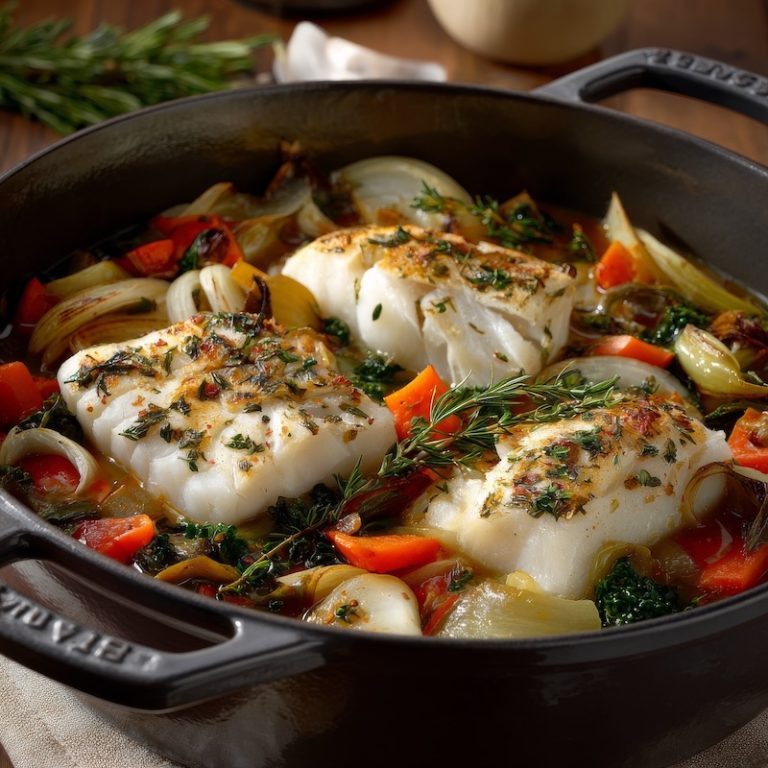
| Firm Fish | Swordfish Steaks | Firm, meaty fish with a mild flavor. | Holds shape in liquid and absorbs seasonings well. |
| Tuna Steaks | Dense, flavorful fish with a meaty bite. | Firm texture stands up to gentle braising. | |
| Shark Fillets | Firm, mild fish similar to swordfish. | Doesn’t flake apart easily in liquid. | |
| Hearty Vegetables | Carrots | Sweet, firm root vegetable. | Holds shape while absorbing braising liquid. |
| Parsnips | Earthy root vegetable similar to carrots. | Adds sweetness and texture to the dish. | |
| Cabbage | Hearty leafy vegetable with dense layers. | Becomes tender and flavorful when slow-cooked. | |
| Potatoes | Starchy tuber in many varieties. | Soaks up sauce and adds bulk to the meal. | |
| Eggplant | Firm vegetable that softens beautifully. | Absorbs sauce and aromatics while maintaining texture. | |
| Fruits | Apples | Sweet or tart fruit depending on variety. | Adds a touch of sweetness and acidity to balance savory flavors. |
| Pears | Delicate, sweet fruit that holds shape when cooked. | Pairs well with pork or poultry braises. | |
| Figs | Rich, sweet fruit with soft flesh. | Adds natural sweetness and depth to braised dishes. |
The Science Behind Braising?
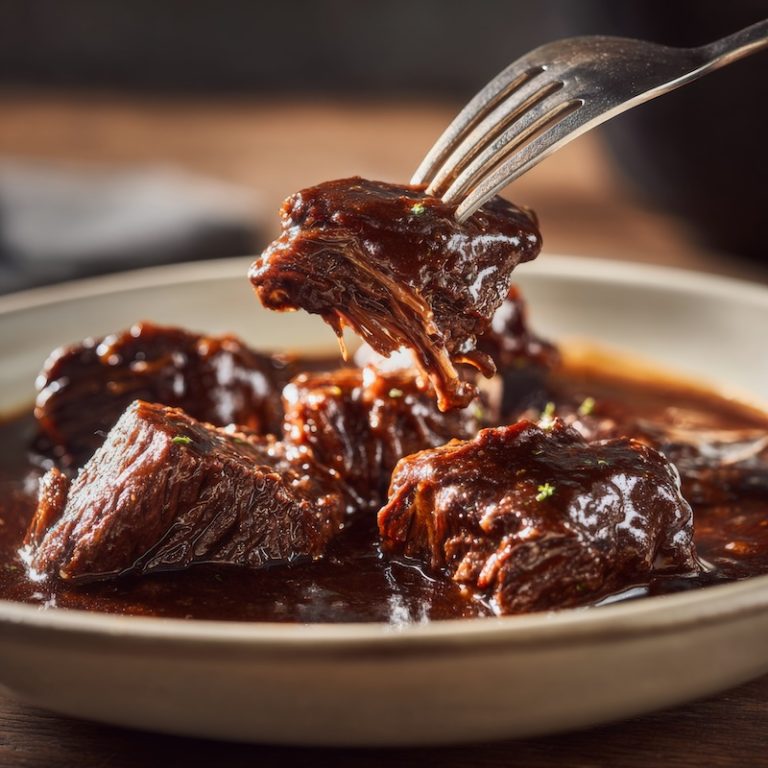
Braising is all about turning tough meat and firm vegetables into something tender and full of flavor. It works by cooking food slowly in a little bit of liquid, covered, over low heat.
When you braise meat, the gentle heat and moisture slowly soften the tough parts called connective tissue. This tissue is mostly made of collagen, which melts into a silky, flavorful substance called gelatin. This is what gives braised dishes their rich taste and smooth texture.
As the meat cooks, the muscle fibers (the “meaty” part) shrink and squeeze out some moisture. If you keep cooking gently, they eventually relax and soak up some of that delicious melted fat and gelatin. That’s when the meat becomes juicy and tender instead of dry.
Vegetables also change during braising. The heat breaks down their structure, making them soft and flavorful. Starches inside them swell and absorb the cooking liquid, adding even more taste.
By the end, your pot is full of tender meat, flavorful vegetables, and a rich sauce made from the cooking liquid, melted fat, and gelatin. That’s why braising—when done right—tastes so amazing. It’s patience in a pot.
Braising FAQ
What foods are best for braising?
Braising works best with tougher cuts of meat and hearty vegetables. Think beef chuck, short ribs, pork shoulder, chicken thighs, carrots, onions, and mushrooms. These foods benefit from slow, gentle heat and absorb flavor as they cook.
How much liquid should I use when braising?
Use just enough liquid to come about one-third to halfway up the food. Braising is not boiling. Too much liquid washes out flavor and prevents the sauce from concentrating.
Should food be fully submerged when braising?
No. Partial coverage is the goal. The exposed portion develops flavor while the liquid gently steams and tenderizes the rest.
Is braising better in the oven or on the stovetop?
The oven is usually better. It provides even, consistent heat and reduces the risk of scorching. The stovetop works, but requires closer attention and frequent checks.
What temperature is best for braising?
Most braises work best between 300°F and 325°F. This low, steady heat breaks down connective tissue without drying out the food.
How do I know when a braise is done?
Braising is done when the food is tender, not when the timer goes off. Meat should yield easily to a fork. If it feels tight or chewy, it needs more time.
Do I need to sear before braising?
Yes. Searing builds flavor. That golden crust adds depth to the sauce and improves the final texture. Skipping this step leaves flavor on the table.
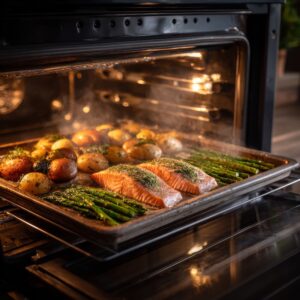
Can I braise vegetables without meat?
Absolutely. Vegetable braises develop rich, layered flavor using broth, aromatics, and herbs. Just shorten the cooking time to avoid mushy results.
Why is my braised meat still tough?
It hasn’t cooked long enough. Tough cuts become tender only after connective tissue fully breaks down. Give it time and keep the heat low.
Can I reduce the braising liquid at the end?
Yes, and you should. Removing the lid and simmering the liquid briefly concentrates flavor and creates a silky, restaurant-quality sauce.
Mistakes We Make When Braising & How to Fix
| Mistake | What It Causes | Quick Fix |
|---|---|---|
| Skipping the sear | Less flavor and a pale sauce. | Sear meat/veg in batches until well-browned before adding liquid. |
| Using too much liquid | Stews instead of braises; diluted flavor. | Add just enough to come halfway up the food (or a bit less). You can finish by reducing the sauce. |
| Using too little liquid | Food can dry out or stick and burn. | Keep enough liquid to create steam and prevent sticking; check early and add a splash if needed. |
| Cooking at too-high heat | Tough meat, uneven cooking, burnt edges. | Maintain a gentle simmer or low oven temp (around 300–325°F / 150–160°C). |
| Opening the lid often | Heat and moisture escape; longer cook times and inconsistent results. | Keep the pot covered. Only peek near the end to check doneness. |
| Overcrowding the pan when searing | Food steams instead of browns. | Sear in small batches with space between pieces; drain and return all to the pot for braising. |
| Choosing the wrong cut (too lean / delicate) | Meat becomes dry or falls apart poorly. | Pick tougher, well-marbled cuts (chuck, short ribs, shanks) or use gentle, short braises for fish. |
| Not trimming excess silver skin or large fat pieces | Chewy bits or greasy sauce. | Trim silver skin and large fat caps; leave some fat for flavor but remove excess. |
| Not deglazing the pan | Missed flavor from browned bits; thin, flat sauce. | After searing, pour in wine, stock, or water and scrape the browned bits before adding the rest of the liquid. |
| Underseasoning at the start | Bland final dish even after reduction. | Season during searing and taste/adjust the braising liquid later (salt concentrates as it reduces). |
| Not skimming fat or impurities | Greasy or cloudy sauce. | Skim surface fat and scum with a spoon during the first hour for a cleaner sauce. |
| Finishing without resting or reducing sauce | Soggy texture and a thin, weak sauce. | Let meat rest briefly. Reduce the braising liquid on the stove to thicken and concentrate flavor before serving. |
| Braising delicate fish at the same time/temperature as beef | Fish overcooks and falls apart. | Braise fish for a short time at lower temps, or braise separately with less aggressive heat and time. |
What to Braise In?
| Cooking Vessel | Description | Why It’s Good for Braising |
|---|---|---|
| Dutch Oven (enameled cast iron) | Heavy, thick-walled pot with tight-fitting lid (often enameled). | Retains and distributes heat evenly. The tight lid keeps moisture in, making it ideal for slow, even braises. |
| Cast Iron Braiser | Wide, shallow pan with tall sides and a lid; usually cast iron or enameled. | The wide surface is perfect for searing then simmering; good liquid evaporation control and easy sauce reduction. |
| Heavy Stainless Steel Stockpot with Lid | Thick-bottomed stainless pot with a weighty lid. | Durable and non-reactive; works well for larger braises and for acidic liquids (tomato, wine). |
| Oven-Safe Skillet (cast iron or stainless) | Deep skillet that can go from stovetop to oven. | Great for searing on the stove then finishing in the oven. Use with a lid or cover with foil for steady moisture. |
| Slow Cooker / Crock-Pot | Electric countertop cooker that holds low steady heat for hours. | Set-and-forget convenience for long, moist braises; won’t brown as well—sear first if possible. |
| Pressure Cooker / Instant Pot | Sealed electric or stovetop device that cooks under high pressure. | Speeds up braising dramatically by breaking down collagen fast. Good when you need tender results in less time. |
| Clay Pot / Earthenware | Unglazed or glazed earthenware designed for slow cooking. | Holds gentle, even heat and adds a mellow, traditional flavor. Ideal for long, gentle braises—handle carefully. |
| Tagine (conical clay pot) | North African lidded pot with a cone-shaped lid that returns condensation to the food. | Circulates and returns moisture, concentrating flavors and keeping food very tender with little liquid needed. |
| Glass or Ceramic Casserole Dish (oven-safe) | Rectangular or oval ovenproof dish with a lid (or covered with foil). | Works well for oven braises, especially for smaller portions or layered dishes; shows the food as it cooks. |
| Roasting Pan with Lid | Large, shallow metal pan that often comes with a fitted lid or is covered with foil. | Good for big cuts or whole birds; use a rack or layer vegetables so meat sits in some liquid but not fully submerged. |
| Covered Saucepan (heavy-bottomed) | Smaller pot with a snug lid, usually used for stovetop braises for 1–3 servings. | Handy for small braises or single portions; easy to keep low, steady heat and monitor doneness. |
| Enamel Roasting / Dutch Oven Hybrid | Lightweight enamel-coated steel pots that look like a Dutch oven but are thinner. | Lighter than cast iron and easier to handle; still holds heat well and is non-reactive for acidic braises. |
Makes Its Own Sauce
During the braising process, the liquid in the pot will reduce and thicken, creating a rich and flavorful sauce. This sauce can be served with braised food or used to make gravy or other sauce to serve with the dish.
One of the benefits of braising is that it allows the cook to use tougher, less expensive cuts of meat. These cuts typically have a lot of connective tissue, making them tough and chewy if cooked using a different method. However, the long, slow cooking process of braising breaks down this connective tissue, making the meat tender and flavorful.
Another benefit of braising is that it is a versatile cooking method that can be used with various ingredients. In addition to meat, braising can be used to cook vegetables, fish, and even fruits. The type of liquid used in the braising process can also be varied to create different flavors, such as using the broth for a savory dish or cider for a sweet and tangy flavor.
Overall, braising is a simple but effective cooking method that can be used to create tender and flavorful dishes. By searing the food and slowly cooking it in liquid over low heat, braising allows the cook to create dishes with rich, complex flavors that will impress.


28 Responses
I love dark meat chicken on the bone but my husband doesn’t like the way it turns out when I roast it so I’m looking for a new way to cook it. thanks for sharing.
Thank you. I will be experimenting with braising for the first time. Dave
Thank you for the concise description of braising.As a cognitively impaired person, this article was perfect to reconnect me with a method of cooking that is easy, enjoyable & winter-perfect with the heat from the stove top and wonderful aromas warming the kitchen. Also, as a retiree it’s important to stretch the budget, and tough cuts that come out tender are perfect for the first meal and the secondary meals,like soup or goulash,that braising provides. Thanks!
I enjoyed reading your response. You certainly do not seem as though you are impaired at all cognitively. I especially agree with your observation regarding utilizing less expensive cuts of meat when braising….that and the taste are reasons enough to use it often! Thanks!
This was such a great post! I just re-blogged it on my own cooking site; couldn’t have explained it any better myself! Thank you for such a detailed explanation of the technique.
After 7+ years disabled, a serious stroke, I have had to live on ‘prepared meals’ from my local supermarket (thankfully ‘Waitrose’). As I approach full recovery, I’m looking forward to the pleasure of being able to cook for myself again. I learned to cook, largely from Elizabeth David’s glorious books – ‘French Provincial Cooking’ and ‘Mediterranean Cooking’ – in my early 30s (1960s), but I’ve lost it all. I need to start over.
I love ‘French Cuisine’ and also wish to be as organic as possible.
Sincerely, Bernard Staines
This was a really cool technique. It is a good form of heating food in Calgary. It looks delicious, that’s for sure.
Brilliant post! Thank you!
You could definitely see your enthusiasm in the work you write. The world hopes for more passionate writers like you who are not afraid to express their beliefs. Always follow your heart.
i love braising! been really easy for me to prepare innumerable dishes. helps a lot especially at this time that i am having chemotherapy.
Sorry to hear about your health situation Susan. My thoughts and prayers are with you.
Hi there! I came across your post after I made braised meat the other night that turned out tough! So, here is my question…a lot of braising recipes will tell you to cook the meat a certain length of time based on pounds. Would it be more accurate to say just cook it till it is tender? For example, if I would have cooked this meat longer the other night, would it have eventually gotten tender or I just did it wrong? The recipe said to cook it an hour per pound…it was a one pound piece, so I cooked it for an hour and called it a day.
Ps…I can’t recall what the meat was but it was some sort of cheap steak that said “great for braising” on the package
🙂
Hi Monica, if I’m cooking a tough cut of meat that needs braising, I like to say, Cook it to fork tender. I’m guessing the person who said cook it for an hour a pound thought you were cooking a much larger piece of meat. Not knowing what cut of “cheap steak” you purchased, it’s hard to say how long I would cook it but it’s hard to image it would only take 1 hour. I think you have it right. “Cook it till it is tender”.
Hello! I love braising pot roasts and chicken. I have always done it on the stove in a dutch oven over very low heat (after initial browning). Generally it is at a very low simmer (<200F) (bubbles very slowly). Why is the oven set to 350F? Won't the liquid boil at that temp instead of simmer?
This is a great question — and it’s one that confuses a lot of cooks because oven temperatures and the actual temperature of the braising liquid aren’t the same thing.
Here’s the key:
When you set an oven to 350°F, you’re setting the air temperature inside the oven, not the temperature of the liquid in your pot. The liquid in a braise is water-based, so it can’t go above about 212°F at normal atmospheric pressure (unless you’re using a pressure cooker). Even if the oven air is 350°F, the braising liquid will sit at a simmering temperature once it’s stabilized.
The higher oven setting compensates for heat loss in a large, heavy pot inside a big oven, especially if the meat is not fully submerged. The hot air helps keep the exposed upper parts of the meat and the pot walls hot enough so the whole system stays in the simmer zone.
I realize this is an old post, but it’ll eventually reach a boil as low as about 195-200f if it is covered because of the pressure change. To maximize flavor without ruining the texture of the meat you are braising, best off doing it like a restaurant and when you move it to the oven, have it at about 250-300f and either keep the lid cracked open a bit for equilibrium or do the parchment w/ vent method. It also allows for your sauce to start concentrating its flavors reducing the amount of time you have to reduce it afterwards
Thanks Angelo for this great tip. I will incorporate it into the post. Keep them coming.
I have had mixed success with braising and have not figured out why. I cooked a whole shin of beef for over 10 hours (recipe said four…) and it became more tender (in parts) but absolutely not the melting fork-soft effect that I expected. Many recipes state that the meat does not need to be completely immersed in the cooking liquid (for example Raymond Blanc shin of beef) – does it work better if the meat is fully submerged?
Mark, when you fully submerge the meat, you are essentially stewing the meat and not braising it.
Thanks for the through overview behind the science of braising. It is informative and interesting.
Please help!
I think this is the technique I’ve been trying to do when making pork chops however, mine have always turned out tough. I usually bring the heat up to high to get the gravy boiling and then turn it down to low. Is it turning out tough because I was too fast bringing it up to a boil? I don’t know what I’m doing wrong.
Justine, braising is for tough cuts of meat like shoulder or rump. Pork chops are typically tender cuts from the loin and are better grilled or pan-fried. Saying that, you can braise pork chops at a very low temperature but you have to cook them for a while, like over an hour to as much as 2 hours. How long did you braise your chops?
G’day mate, just curious to whether i can brown my meat in a frying pan with oil then transfer the meat into a heavy based pot, or cook the meat on a high heat in the pot, then turning the temperature down to begin braising?
Sure, you can brown the meat in a fry pan or cast iron skillet and then transfer to a slow cooker or even do everything in a Dutch Oven or an enameled cast iron pot.
Sorry, I’m not sure I understand what you mean by ‘Website’.
I just read How to Braise Everything (June 2018). Wonderfully concise and informative, by-the-way. The title really caught my attention I was looking forward to reading about braising as it applied to boneless, skinless, chicken breasts. Darn, you say it doesn’t. Still, muscle fiber is muscle fiber, so why would braising not apply to chicken breast, I wonder. Wouldn’t the muscle tighten up and squeeze out moisture and then, given enough time, relax and draw it back in–the lack of collagen not withstanding? Any thoughts you have would be greatly appreciated. If you can point me to some reference material, that would be great too. Hope to hear from you. Thanks.
Hi Dick, of course you can braise chicken breasts but why would you. Braising is typically used for cooking tougher cuts of meat with lots of connective tissue that does better with this cooking technique. Boneless, skinless chicken breasts do better using a quick pan fry cooking technique but you can still braise them if you want to. I would suggest you cut the breast meat in to cubes so the cooking time is less thus preventing the meat to dry out as quickly.
“…, but why would you?” That’s a good question. We eat a lot of poached chicken breast, or would really, but even poaching it seems to dry it out and make it tough. So, based on your article, I thought perhaps the problem was that breast muscle contracts as you describe, expels moisture, and is cooked before it’s had an opportunity to relax and take moisture back in. Hence, braising seemed like a possibility.
Thank you for your prompt reply. This is the only article of yours that I have read–so far. But, I’ll be back, as the terminator said. Thanks again. Best regards.
I was always taught that you absolutely never sat your meat in the liquid. It was placed on a bed of vegetables and a little liquid was added but not deep enough to touch the meat. I shall try your method, it also makes sense as does the way I’ve been taught and using for 50+ years.
Thanks