
How to Take the Best Photos of Your Meals
Not only a “reluctant” gourmet, but I’ve also been a “reluctant” food photographer, and that will change over the next few months. Why? Because I’m now friends with professional photographer Tim Turner who has forgotten more about shooting food images than I’ll ever know. Tim has taken food photos professionally for over 30 years and has photographed dozens of cookbooks for some of your favorite chefs.
I met Tim last year when we visited our daughters at parent’s weekend at their college. Our daughters were friends and arranged for us all to go out to dinner to meet each other. I knew Tim was a very successful food photographer, but I didn’t want to bother him with many questions about his profession.
This year’s parent’s weekend was different. We spent a lot more time getting to know each other, and when I told him I wanted to learn how to take better photos of what I was cooking, he was happy to answer my questions and was incredibly generous with ideas, techniques, and encouragement.
Keeping It Simple
What I most appreciate about Tim’s approach to food photography is how simple he makes it. He could have overwhelmed me right from the start with technical information about F-stops, shutter speeds, ISOs, and all the other important photography jargon that I’m sure we will sometimes talk about. Still, he started by asking me what type of light I was using and where it was in relationship to what I was photographing.
I told him I sometimes use natural light when the weather outside is cooperating but most often use the dining room overhead light or, when motivated, my softbox lighting kit, which I purchased online for less than $75. And when I do use the professional-quality light, it’s usually placed behind me on the left or right.
Most Important Tip So Far
Tim explained that it didn’t matter if I used natural light outside or entered the house through a window. He suggested that if I like using natural light, I go out and buy a small cart on wheels, the kind you can find at stores like Ikea or The Container Store. This way, you can set up your tabletop props and move them all together depending on where the light comes into the house. It makes sense to me.
He would not consider the overhead dining room light, but he suggested a standard light fixture would be fine if placed in the right position. He absolutely appreciated my use of a softbox light and a piece of foam core board you can pick up at any office supply store. I’ll have to ask him about the different bulbs available for photography and which ones he recommends most.
His first tip was to think of my setup like a clock, with the camera sitting at 6 o’clock and the food on the table directly in front of it. Next, place the light source at 10 or 2 o’clock rather than where I usually had it coming from behind me.
The white foam core is placed on the opposite side of the source light at 5 or 7 o’clock. It reflects light from the source to “fill in” the front of the plate and food. Moving around to get just the right amount of fill is easy.

See the Difference
As you can see from the photos of my test salad photos below, keeping the source light at the same height and approximate distance from the plate of salad, there is quite a difference in results when the light is behind you at 5 o’clock and when it’s at 2 o’clock.
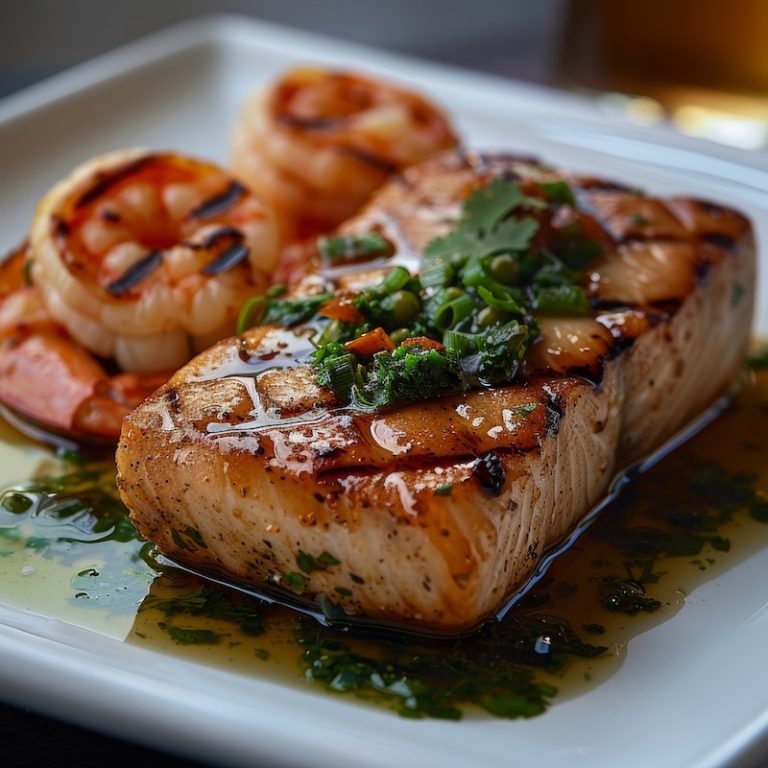
Tim explained that having the light behind you will make your food look “flat,” whereas having the light coming from behind the food will give it some “pop” by giving it more depth. The photo of the shrimp risotto above was shot with the source light at 2 o’clock.
Both photos below are shot with the camera the same distance from the salads, 35 mm, and no Photoshop filters or adjustments were made. I’m hoping to learn more about “fixing” up my photos using those tools in the future.
Please don’t pay attention to the props, background, camera height, or focus; instead, look at the lighting for differences and decide which one appeals to you. We will examine all these other facets of photographing food in the future, but for now, this one tip will help anyone take better food shots.
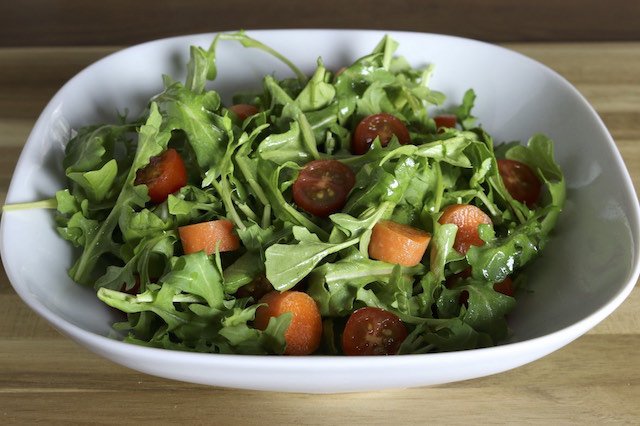
Source Light Behind the Camera at 5 o’clock. Light is Flat
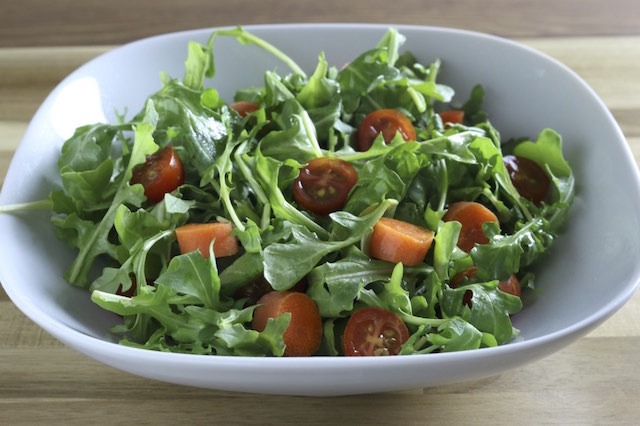
Source Light Behind the Salad at 2 o’clock. Makes the Food Pop.
My Homework Assignment
For homework, Tim suggested I compare photos by moving the light higher than the table and even with the table. Then, I move the light closer to the table and further back and see what different results I get.
I’ll tell you what I discovered and then what Tim had to say about my experiences.
I hope you enjoy these posts. I invite you to tell your friends if they are interested in learning more about food photography.
2 Responses
Thank You for the shout out. Way to much about me but I understand the need. Now everyone knows me. Hello! About Gary- He didn’t forget a thing I told him, even whilst sipping a beverage and cooking burgers on a cheap grill. My advice is he will be a great conduit of info for everyone interested.
I would suggest doing a storyboard, or a series of photographs of a dish like a salad with a few tomatoes, croutons and cucumber slices. Start with the light at 7 o’clock and move it around the clock till 5 o’clock. String all the photos in a row and it will give a very easy to follow map of the light. You can do a second pass with the light higher and a third pass around the clock with the light at a low angle, about table height, and see the real differences.
I am very glad to be a part of the LESS Reluctant Gourmet Photo Studio.
What More Homework? Just kidding. What a great exercise for all of us who want to improve our photo skills to try at home. Thank you Tim for working to help me learn more about food photography so I can share it with my readers. I’m hoping we can all learn a lot while having fun at the same time.