The Blanching Highlights
You’ve probably read the directions in many different recipes.
“Plunge into rapidly boiling water for one minute. Remove and plunge into ice water to stop the cooking process.” - that's Blanching
Learning how to blanch foods is an important technique for home cooks. Blanching is a two-step process in which foods are plunged into boiling water, usually for only a minute or two and then put into ice water to rapidly stop the cooking process.
You can also blanch in fat, but this technique is not often called for.
Reasons to blanch:
- to loosen thin skins from fruits and vegetables
- to brighten and fix color
- to achieve "crisp-tender" texture
- to parboil vegetables for mise en place
- to prepare fruits and vegetables for long-term freezer storage
How to blanch:
- Prepare an ice bath: put water and ice into a large bowl or into a clean sink.
- Heat a large pot of water to a rolling boil, about 1 gallon per pound of food to be blanched.
- Add salt to the water; the water should be very salty.
- Immerse the food into the boiling water for the specified amount of time.
- Remove food to the ice bath to cool quickly.
- Once cool, remove food from ice bath and pat dry.
A Note About Salt
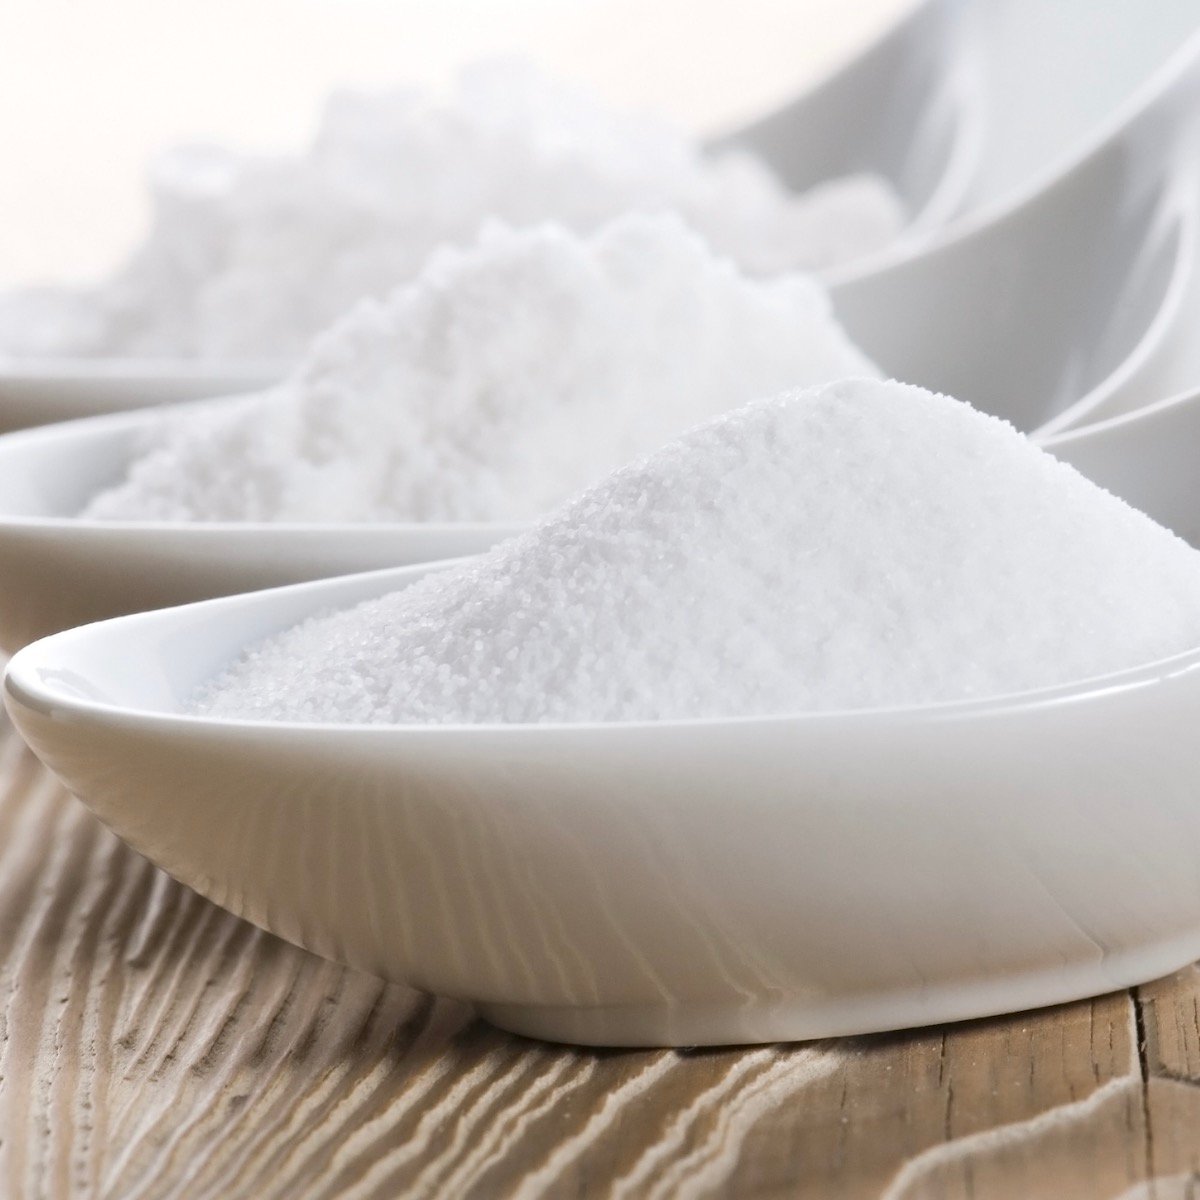
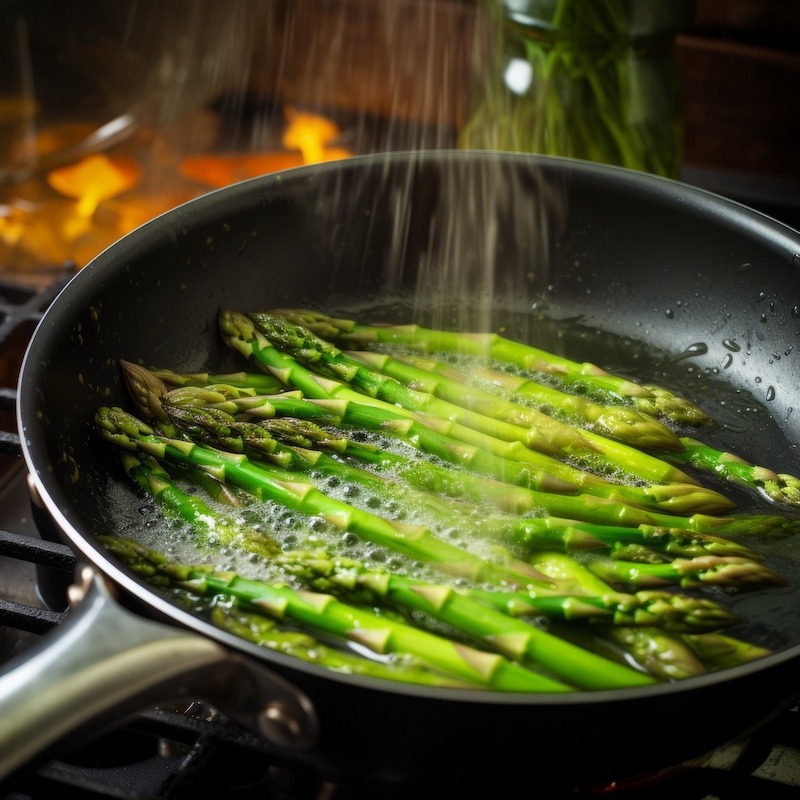
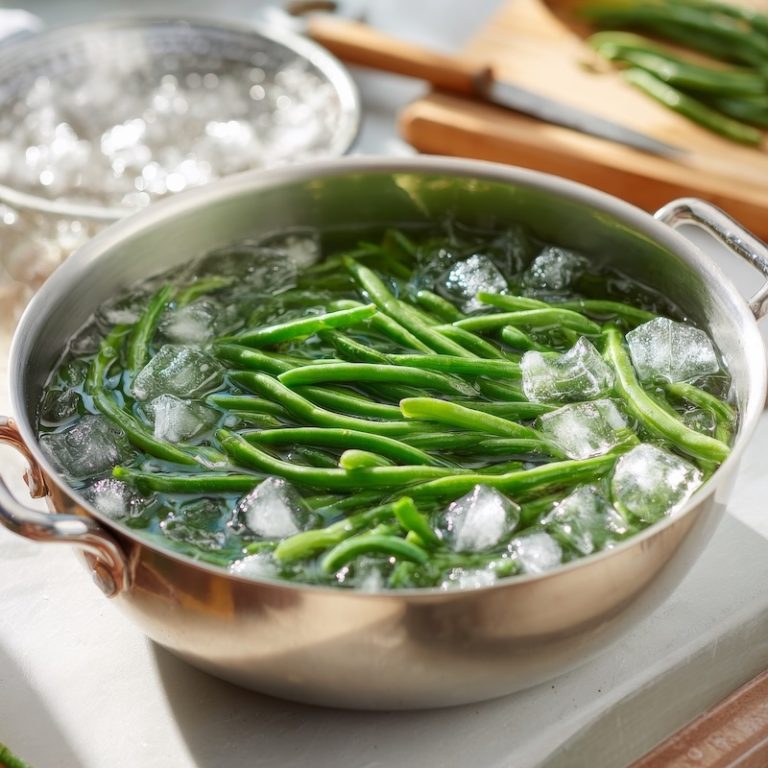
Blanching water should be very salty. Some say "ten times saltier than ocean water." That is a lot of salt, but there are a couple of good reasons for salting your blanching water very well. First of all, salty water is denser than unsalted water--it's why we're so much more buoyant at the beach.
The salty water on the outside of the food is denser than the water inside the food, so it helps prevent nutrients from leaching out of the food into the water. Of course, after a certain point, nutrients will leach out. Since blanching is such a quick cooking technique, though, it is not of particular concern.
Another good reason to use well-salted water is that the salt helps to keep green vegetables greener. Again, since blanching is a quick process, it doesn't take long for vegetables to go from bright green to olive drab--maybe just 2-3 minutes--so using very well salted water helps ensure that your vegetables stay nice and green.
There is a scientific reason for this having to do with the magnesium at the heart of chlorophyll molecules. Suffice to say that salting your blanching water helps keep the magnesium in the chlorophyll where it belongs, keeping things nice and green.
A third, though arguably less important reason to use very salty water for blanching is that, since the process is so short, there is not enough time for the food to absorb much flavor. Over-salting the water (seasoning-wise) allows more salt to flavor the food in a very short period of time.
So, how much salt should you add to your blanching water? It's really a personal preference, but start with one tablespoon of salt per gallon of water and then go from there.
Blanching Foods: In Depth
Blanching is one of those techniques that home cooks do not often employ, but it is a useful technique to know. It is easy to do, it doesn't take much time, and it can make life in the kitchen easier.
For example, have you ever tried to peel a fresh peach. It's an exercise in patience, if not in futility. Ditto for tomatoes, nectarines and cipollini onions.
To Par-Cook
Using blanching to par-cook is also a great restaurant time-saving trick. Can you imagine having to cook raw vegetables for, say, ten minutes for every order?
With multiple orders, a cook could easily find himself “in the weeds” if they don’t incorporate blanching as part of their mise en place.
If the cook blanches vegetables for 6-7 minutes, bringing them close-to-done, a simple 3-4 minute reheat will bring the food all the way to done, saving the cook a whole lot of time (and keeping the customers happy).
Freezing Foods
One of the most critical uses for blanching is as a step before freezing or canning. In the case of food preservation, blanching does two things.
First, it can kill any little microorganisms that might be contaminating your fruits or vegetables. Second, blanching can kill the enzymes naturally present in the food.
These enzymes are responsible for ripening and eventually browning and spoilage. These enzymes can remain active even when frozen, so for long term storage, it is important to kill them to keep the food as fresh as possible.
Simply cut the food in whatever size you like, blanch until the color intensifies, and then shock in ice water. Once cool, spread out the food, dry thoroughly, and then freeze in heavy duty freezer bags.
Now that we know what to blanch and the reasons why we blanch, let’s review the technique, which is identical for every food you will ever have to blanch. The only differences will be in the time you leave the food in the boiling water and whether or not you cut the food or leave it whole.
How to Blanch Foods Properly
To blanch, you will need a large pot full of water. Bring it to a boil with the lid on. Leaving the lid on will diminish the time it takes for the water to boil.
While the water is coming to a boil, fill either a large bowl, or a sanitized large sink, with ice water. You will also need a large strainer and an area that you have covered with lint-free towels, for drying the food after blanching.
The trick with blanching is to keep the water at a rolling boil, even when you add the food. So, it stands to reason that, if you don’t have a huge pot, you will only be able to blanch small amounts of food at a time. Here is the procedure.
- Once the water has come to a rolling boil, add the fruit or vegetables and let boil as long as necessary. This will depend on why you are blanching and could take anywhere from 45 seconds to several minutes. Consult your recipe if you are unsure.
- Remove the food from the boiling water with the strainer and immediately place it in the ice water. Stir the food around to chill it quickly.
- Repeat steps one and two until all the food has been blanched.
- Use the strainer to remove the chilled food from the ice water. Drain and dry on lint-free towels.
How Blanching Makes It Easier to Peel Thin-Skinned Fruits and Vegetables
When you boil any type of fruit or vegetable, it cooks from the outside (the part closest to the boiling water) in. By putting fruits or vegetables in boiling water for just a minute or two before putting them into ice water allows just the very outer part of the fruit, the part just under the skin, to become soft.
Once that happens, it becomes very easy to peel thin skins off of these fruits and vegetables; the skin will easily pull away from the very thin and very soft cooked layer.
To make it even easier to peel, use a sharp knife to cut an X in the bottoms of the food you are blanching: peaches, nectarines, apricots, tomatoes, cipponlini or pearl onions. Once you have stopped the cooking process in the ice bath, simply use a sharp paring knife to pull up the edges of the skin where you made the X and peel away.
How Blanching Brightens and Fixes Color
When we talk about brightening and fixing color, we're talking about the color green in vegetables like broccoli, spinach, kale, green beans, peas, etc. Have you ever noticed that orange carrots and peppers are bright orange, that red peppers are bright red and that yellow peppers are bright yellow but that green vegetables are a bit dull looking?
That's because, even though the green of the chlorophyll in those plants is there providing the green color, small air pockets cloud the color. A quick plunge into boiling water bursts some outer cell walls allowing the air to escape and letting the true bright green of the chlorophyll shine through.
If you've boiled green vegetables too long, you know that they turn from a bright, vibrant green to a dull olive green. To prevent this from happening, remove the food you are blanching to an ice bath when it is still bright green. For tender greens like basil or spinach, this can be as little as 30 seconds.
For more substantial green vegetables such as peppers, broccoli or green beans, expect to blanch for up to two to three minutes. The main thing to remember is not to walk away and to shock them in ice water as soon as they are a lovely bright green.
Blanching not only brightens but it also fixes the color. What this means is that blanched vegetables do not turn brown over time like raw vegetables do. All fruits and vegetables contain enzymes that, if left unchecked, break down the foods into what is ultimately a brown, slimy mess.
Raising the temperature of the food to over 120°-140°F (depending on the enzyme) essentially denatures or turns off the enzymes so that the food does not brown.
What Is An Ice Bath?
After blanching, vegetables are often placed in an ice bath or bowl filled with water and ice to stop them from continuing to cook and preserve their color. This is also called shocking the vegetables. Once you have cooled down the ingredient in an ice bath, you need to remove them right away so they don't get waterlogged.
How Blanching Helps You Achieve a Crisp-Tender Texture
While tender raw vegetables such as spinach, arugula and other herbs and lettuces do not need to be cooked to be enjoyed, denser vegetables can benefit from a short blanch, even if they are to be served cold. If you take the time to blanch green beans, broccoli, cauliflower, peppers or other vegetables before adding them to a cold salad or crudités platter, you will notice that the blanched vegetables are sweeter and have a pleasing "crisp-tender" texture.
Your blanched vegetables will be sweeter because some of the cell walls will have ruptured, releasing sugars and other flavor compounds. They will be crisp-tender because the outer part of the vegetables will be tender from being cooked while the interior is still crisp and raw-tasting. Crisp-tender is to vegetables what al dente is to pasta.
While it takes longer to achieve crisp-tender than it does to blanch to peel, generally speaking, a vegetable will be crisp-tender at about the same time that it is a beautiful bright green color. For vegetables that are not green, such as cauliflower, allow 2-3 minutes.
The best test for crisp-tender is tasting, so do not hesitate to remove taste during the cooking process and remove the food to an ice bath when you are happy with the texture.
How Blanching Foods Helps with Your Mise en Place
This reason for blanching is similar to blanching to achieve a crisp-tender texture but assumes that the food will be further cooked later. It is almost exclusively used in restaurant kitchens but is a great technique for home cooks to learn. Say there is a dish that has boiled potatoes as a side. The dish takes 7 minutes to cook, but the potatoes take 12 minutes.
Ideally, the main and the side should both be ready at the same time. An easy way to ensure this is to blanch or parboil the potatoes in boiling water for 5 minutes and then shock them to stop the cooking process.
Then, when someone orders that dish, each component will be ready in 7 minutes. Blanching is only called parboiling when foods will be further cooked later. Otherwise, it is exactly the same technique.
How often will you have to use this technique at home? Probably not very often, but it is a useful technique to have in your arsenal for holiday gatherings or dinner parties where it pays to get as much prep out of the way as possible so you don't find yourself chained to stove when your guests arrive.
Saying that, I recommend you experiment with blanching and see if it helps you save a little time.
See String Beans with Sauteed Tomatoes & Garlic
If you make a lot of stir fries, this technique can come in handy. Well before you plan to stir fry, blanch cut up firm vegetables such as carrots, cauliflower and broccoli for 2-3 minutes and then shock in cold water.
When it's time to stir fry, you can put all the vegetables, tender and firm, into the wok or stir fry pan at the same time instead of adding the firmer vegetables first. This just simplifies the cooking process and helps you get dinner on the table that much faster, especially if you did the blanching a day or two beforehand and refrigerated your vegetables.
How to Blanch Foods to Prepare Foods for Freezing
As mentioned above, blanching can turn off enzymatic activity and prevent browning. This is particularly important in freezing fresh fruits and vegetables because enzymes still function at freezer temperatures. This means that, over time, your lovely summer peaches will turn brown, even after you have "safely" frozen them.
The process to blanch foods for freezing is the same as any other blanching. If necessary, cut the food to uniform shape and submerge food in batches into vigorously boiling water for about 2 minutes - enough time to denature the enzymes.
Remove the food to an ice bath to stop the cooking process. Dry the food thoroughly and freeze in a single layer on a parchment-lined baking sheet. Once the food is frozen, you can store them in freezer bags or other freezer containers.
Note that the cell walls of fruits and vegetables will be damaged by ice crystal formation in the freezer. Because of this, once thawed, most fruits and vegetables will become soggy and are best suited to stews and soups (in the case of vegetables) and pies or muffins (in the case of fruits).
The faster you can freeze food, the smaller the ice crystals and the less damage to cell walls. Freezing foods in a single layer can minimize damage to the cell walls, but home freezers do not freeze foods quickly enough to completely eliminate damage.
How and Why to Blanch Foods in Fat
Fat blanching is very different from boiling water blanching. While water blanching is used for many purposes, fat blanching is a method to partially cook a dense vegetable without browning it. The only case of fat blanching that I know of is in making really good French fries.
The secret is a two-stage frying method. The first stage - the blanch - happens at a lower temperature to cook the potato all the way through while the second fry happens at a higher temperature and provides deep golden-brown color.
To make really great fries, cut and dry your potatoes really well. Blanch them for 4-5 minutes in oil that is about 325F. Remove to paper towels. At this point, you can finish cooking them later or continue.
Using the same oil, heat it to about 370°F and fry for an additional 2-3 minutes until deeply golden brown. Drain and add salt and any additional seasonings.
This technique can also be employed when frying any dense vegetable, such as sweet potatoes, parsnips or even turnips.
How Long Does It Take To Blanch Foods?
One of the most underrated cooking techniques is blanching. A 2-step process where you plunge ingredients into boiling water and then immediately stop the cooking by giving them a cold bath.
Chefs and home cooks use blanching for a variety of reasons including peeling fruits and vegetables, brighten food colors, prepare for freezing and prep for mis en place.
The numbers below represent times for water blanching. There are other methods of blanching using steamers and microwave ovens but I prefer to use boiling water for my blanching.
It's also important to note that it is important to blanch in a rolling boil so if you are blanching in batches, make sure you bring the water back to a rolling boil before adding new ingredients.
Lastly, these blanching times come from a variety of sources like the National Center for Home Food Preservation and the University of Minnesota but none of these sites offer amounts to go with the times.
It makes sense though, the more stalks of asparagus you add to the pot, the time should take longer than if you just blanched one item.
So use these times as guidelines and make note of your own experiences for future blanching.
Vegetable & Fruit Blanching Times
| Vegetable | Blanching time in minutes |
|---|---|
| Artichoke Hearts | 7 |
| Artichoke – Jerusalem | 3 to 5 |
| Asparagus – small stalk | 2 |
| Asparagus – medium stalk | 3 |
| Asparagus – large stalk | 4 |
| Beans – snap, green, or wax | 3 |
| Beans – lima, butter, or pinto - small | 2 |
| Beans – lima, butter, or pinto - medium | 3 |
| Beans – lima, butter, or pinto - large | 4 |
| Broccoli (flowerets 1 ½ inches across) | 3 |
| Brussels sprouts – small heads | 3 |
| Brussels sprouts – medium heads | 4 |
| Brussels sprouts – large heads | 5 |
| Cabbage or Chinese cabbage – shredded | 1 ½ |
| Cabbage or Chinese cabbage – wedges | 3 |
| Carrots – small, whole | 5 |
| Carrots – diced, sliced, or lengthwise strips | 2 |
| Cauliflower (flowerets, 1 inch across) | 3 |
| Celery | 3 |
| Corn-on-the-cob – small ears | 7 |
| Corn-on-the-cob – medium ears | 9 |
| Corn-on-the-cob – large ears | 11 |
| Eggplant | 4 |
| Greens – collards | 3 |
| Greens – all other | 2 |
| Kohlrabi – whole | 3 |
| Kohlrabi – cubes | 1 |
| Okra – small pods | 3 |
| Okra – large pods | 4 |
| Onions (blanch until center is heated) | 3 to 7 |
| Onion rings | 10 to 15 seconds |
| Parsnips | 3 |
| Peas – edible pod | 2 to 3 |
| Peas – green | 1 ½ - 2 ½ |
| Peppers, sweet – halves | 5 |
| Peppers, sweet – strips or rings | 3 |
| Potatoes | 3 to 5 |
| Rutabagas | 3 |
| Soybeans – green | 5 |
| Squash – summer | 3 |
| Turnips | 3 |
Fruit Blanching Times |
|
| Tomato (for peeling) | 30 seconds |
| Apples (for peeling) | 30 seconds |
| Peaches (for peeling) | 30 seconds |
| Pears (for peeling) | 30-60 seconds |
Final Thoughts
Now that you are more familiar with blanching, I hope that you can begin to see its time saving and money saving possibilities. Par-cooking some of your vegetables for a Thanksgiving or Christmas meal might make your life easier.
Blanching some broccoli or green beans for a salad not only makes them a vibrant green, but it just might get rid of some of those enzymes that make some of these cruciferous vegetables hard for some of us to digest.
Blanching before freezing can help ensure that your bumper crop of cauliflower from going bad, even in the deep freeze.
And, for those of you who have made a right mess of a peach when trying to peel it, myself included, blanching can be the technique that turns the idea of making a fresh peach cobbler from “No way!” to a walk in the park.


suzanne murphy
this website is wonderful! I found out about why to blanch spinach before stir-frying. Will look for other kinds of information thank you.
Allie Kay Spaulding
Thanks very much for a very thorough, very informative article. I just made some kale pesto, and I blanched the garlic and the kale in the process. The kale is a very satisfying bright green, as is the finished pesto. I appreciate your comments immensely. Allie Kay
Terry
Well written and concise, thank you! I've been cooking for a long, long time, but only recently have begun the journey refinement and deeper understanding of the hows and whys we do or don't do some things. Soooooo. Have you ever wondered about that super-clean, acid-washed feeling on your teeth after eating fresh sauteed spinach, chard or kale? Oxalates!! Or oxalic acid (i think.) I can't explain the chemistry or technical aspects of this, but my loose understanding is that they do already exist in our bodies and are normally excreted without issue. Certain issues like stones, leaky gut and other digestive issues can be exacerbated by high oxalate intake. It appears that oxalic acid is an oxidant.
Long story short, BLANCH YOUR LEAFY GREENS!!! Yeah, I know, i used to really enjoy semi crispy spinach, but after blanching a few times, WOW!! I FEEL so much better after I eat them. My teeth don't feel acid-washed and I don't bloat or belch. Try doing chard both ways and you'll see what I mean. Wash it well, prepare one bunch the old way. Take the other bunch and blanch the whole leaves, stems and all. Pull it out and rinse under cold water (i don't have an ice maker anymore and I cook it right away anyway.) Right when you pull it, throw some onions in a hot pan with your favorite fat. Drain the chard as well as possible without going to the hassle of actually drying it. Starting with the stems, chop fine until you get to the leaf then chop roughly, about half to one inch strips. Throw some minced garlic in the pan and when it's done releasing it's strong aroma, throw in the chard. You don't have to cook this very long, I usually give it 5 to 6 minutes for tender-almost-crispy, or if the wife is sharing, I cook it til it's dead, 15 min or more (that's a whole other story, but a pertinent one if you or a loved one has gut issues like mine.) Can be seasoned in the usual multitude of ways, I happen to love any kind of toasted nuts and crumbly goat cheese. Hope this was helpful.
Kailash
I had heard that blanching lowers the oxalates in many high oxalate foods like spinach and green chard. When I put oxalates in your Search window, it brings me back to this page about blanching but I did not see any reference to oxalates at all in this page.
Can you help clarify?
Thanks.
Kailash
Kailash
I just saw that the reference to oxalates was in Terry's post above!
Thanks.
Kailash
Kailash
Can you blanch grains like brown rice and millet , before cooking them? Can this be an alternate method to soaking?
Thank you,
Kailash
The Reluctant Gourmet
Hi Kailash, great question and I think I found a good response plus a lot more great information at the sagevfoods.com website. They say, "For almost all types of white rice, the best quality is achieved when the rice is washed, soaked, blanched or boiled, and then steamed." - So I guess according to them, you can blanch rice before steaming.
damali
Thank you it is helpful am gonna practice and enjoy.
Gwen
This is an excellent tutorial on blanching. Thank you so much. It's exactly what I needed to reference when dealing with freezer meal prep.
G. Stephen Jones
You are very welcome Gwen. Thanks for your comments.