Aunt Judy's Valencia Paella Recipe
Ingredients
- ½ pound mussels
- 3 tablespoons olive oil
- 1 onion chopped
- 1 Italian sweet pepper thinly sliced
- 2 14.5 ounce cans cans dice tomatoes drained well
- ½ pound artichoke hearts peeled and quartered
- 2 cups Arborio rice
- Cuttlefish ink optional
- 1 pinch saffron
- 6 cups seafood stock
- salt and pepper to taste
- ½ pound shrimp peeled or not peeled, up to you
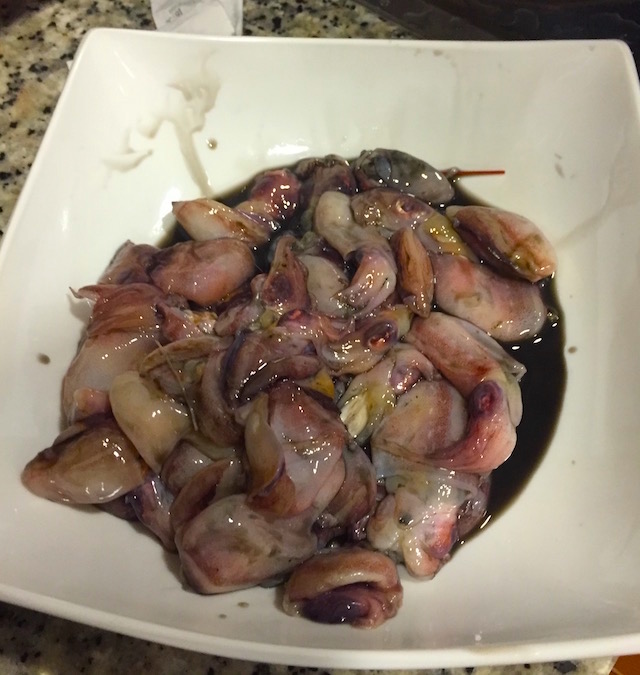
- ½ pound squid cleaned and cut into tight rings
Instructions
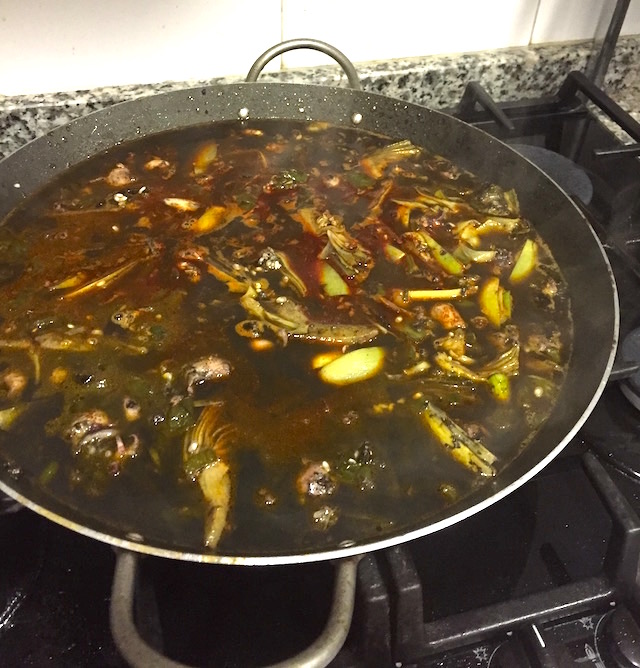
- Prep all the ingredients including the pepper, tomatoes, artichoke hearts and seafood stock. You want the seafood broth hot before adding to the rice so heat it up in a separate pan just before adding.
- Heat the oil in the paella pan over medium heat until hot. Add the onion and cook for a minute or two.
- Add the pepper slices and continue cooking for 2 to 3 minutes.
- Add the diced tomatoes and continue cooking for 3 - 5 minutes.
- Add the artichoke hearts, cover the pan and cook for another 3 minutes.
- Add the rice and stir all the ingredients to evenly cover the rice with the oil and vegetables.
- Add the pinch of saffron and stir once more.
- Add the seafood stock, stir and let it cook on medium low to a simmer. If too hot, reduce the heat. If not hot enough, add some more. Cook for approximately 20 minutes.
- While the rice is cooking, give it just one or two more stirs and re-position the pan on the stove top occasionally so it doesn't get too hot on any one part of the pan.
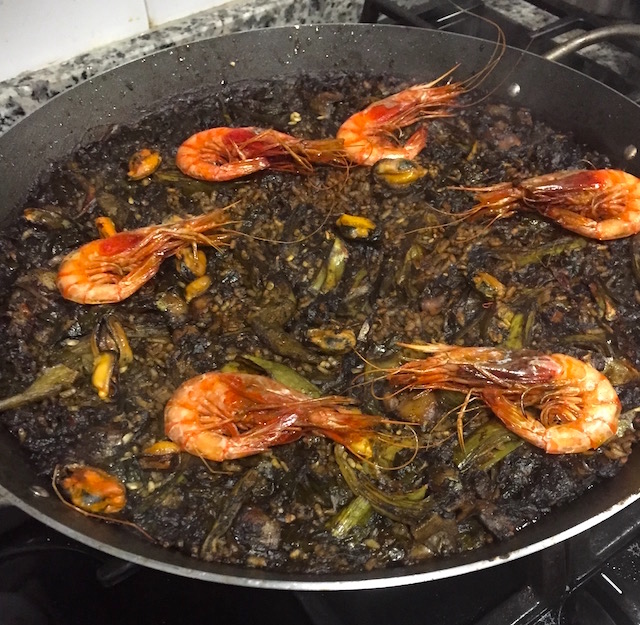
- The rice is done when it is "dry throughout and has formed a nice brown crust on the bottom" of the pan.
- While the rice is cooking, steam the mussels in another pan so they are ready to add to the dish at the end.
- When the rice is done cooking and all the mussel shells have popped open, add the shrimp to the pan cover and cook for a few minutes.
- Add the squid, cover and cook for no longer than 1 and ½ minutes.
- Return the mussels to the pan and serve with aioli.
- Add the rest of the seafood to the top of the rice, cover and cook (steam) until the squid and shrimp are just tender, about 1½ minutes.
Notes
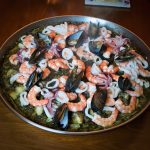
Aunt Judy’s Classic Paella from Valencia, Spain
by Aunt Judy – sister-in-law, world traveler, great cook
We spent two weeks in Spain last December. The first week was my husband’s birthday trip to Barcelona, which we spent “tripping” on Gaudi!
The second week was a sunny winter beach vacation in Alicante with our daughter and her two children from Sligo, Ireland. In between, we spent two days in Valencia to see the sights. Little did we realize the culinary adventure in store for us there!
Before we arrived at our VRBO apartment, our host Emilio contacted us and offered to teach us how to make paella. We accepted his offer immediately and selected black seafood paella from his listed options. (You can add any combination of ingredients to paella—see Mark Bittman’s master recipe .)
When we arrived, he had already purchased all the ingredients from the market, including fresh vegetables and seafood. We had such a good time putting it all together that Emilio stayed and joined us for dinner.
The next day, my husband Bill and I went to the market to replenish our paella ingredients, and we made it again that night. It was almost as good as Emilio’s. So we really can’t recommend any other restaurants in Valencia!
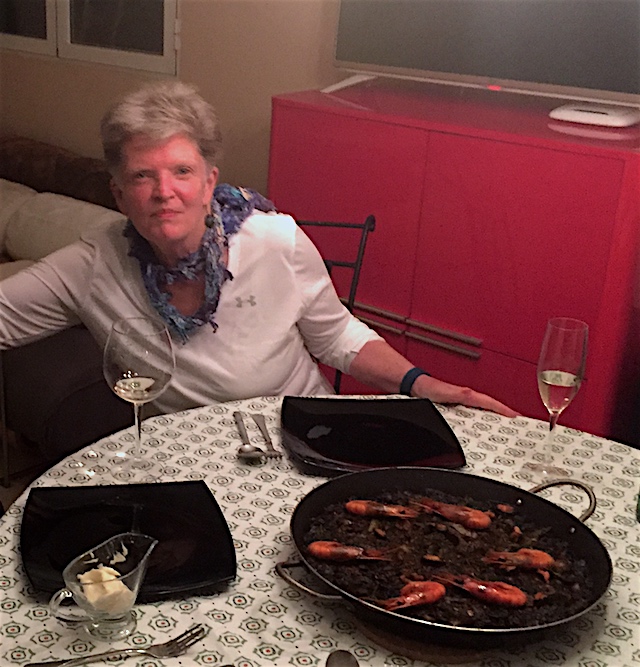
Traditionally, you serve the paella by carrying the paella pan right to the table, and everyone eats directly out of it. Of course, you can also plate individual servings, but I still think having the finished paella pan on the table is so spectacular you want to have it as the center of attention so everyone can “ooh and aah”!
Also, seafood paella is traditionally served with aioli—a garlic mayonnaise—and a great fat! It’s sort of like ordering snails so you can eat the garlic butter.
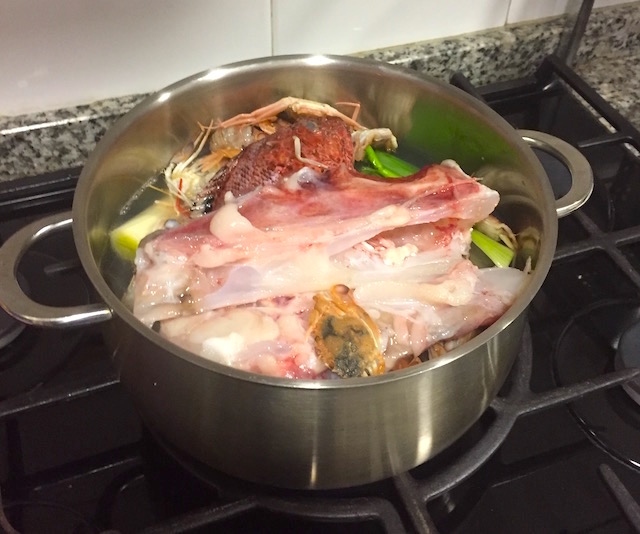
Prep the Seafood
We then started the mussels steaming so we had something to snack on while preparing the paella. He used very little liquid in the mussel pot—I guess they released enough liquid. He did add some smoky paprika for flavor. Very tasty!
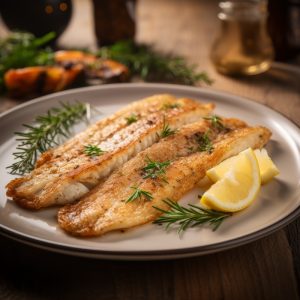
Prep the seafood you will put on top of the paella. Emilio had langostino for the top of our Valencian paella. At home, I have used shrimp, mussels, and squid.
Note: I had never prepared squid before, so I asked the fish guy at Wegman’s how long to cook it. He replied no more than one and a half minutes OR one hour!
By that, he meant that to end up with tender squid, you must cook it briefly or for a very long time. I kept it under a minute and a half, and it was superb!
Type of Rice and How Much
Note: The following is the only “fact” I have in this piece. I like facts, but since I learned them on the fly, I can only pass the guidelines on to you to make up as you go along.
You calculate the amount of rice for paella as 50 grams per person. The amount of liquid is four times that of rice, so 200 grams per person.
He kindly measured the rice—50 grams is about one-half cup. So now, I use one-half cup of rice and 2 cups of broth per person at home. He had bomba rice for us. I have used Valencia rice and Arborio rice at home—don’t use long-grain rice or sticky sushi rice.
Cook – Stir – Cook
We let it cook for about 20 minutes, maybe stirring gently once or twice and occasionally re-positioning the pan on the burner. The paella is done when it is dry throughout and has formed a nice brown crust on the bottom (soccarat).
One test for doneness is to tilt the pan to thirty or forty-five degrees—the paella should not fall out!